

Enhancing the Skywatcher Explorer 150P-DS (Part 1)
In this series of articles I will explain the modifications and enhancements made to my second-hand Skywatcher Explorer 150P-DS Telescope to improve it’s performance for Astrophotography.
The Skywatcher Explorer 150P-DS is an affordable Newtonian reflector telescope, based on the popular Explorer 150P but with a few subtle changes to make it better suited for astrophotography. While the 150P is intended for visual astronomy with a single speed Crayford focuser and a selection of eyepieces, the 150P-DS comes with a dual speed Crayford focuser for more accurate camera focus.
Although sold as an astrophotography Newtonian, it is very much a budget instrument intended for beginners, with a basic design and cheap components. This means there is plenty of room for improvement, and the telescope is well supported with many aftermarket parts available to vastly increase it’s performance and accuracy. After watching many YouTube videos and reading articles online I was fairly confident that buying and modifying one would be worth the effort, based on other astrophotographer’s experiences.
Knowing I would immediately dismantle the telescope and discard several of the components, I decided to buy a second-hand example from eBay rather than a new one, since any warranty would be void as soon as I took it apart! These Newtonians are fairly plentiful second-hand, Skywatcher has been making them for quite a long time and they are very cheap to buy brand new. I didn’t have to wait long before one came up for sale within a sensible driving distance from home, with the added bonus of an EQ5 GoTo mount included. Once I got it home a quick check over of the O.T.A. (Optical Tube Assembly) revealed no unexpected problems, just a coating of dust and a few cobwebs. I completely dismantled the O.T.A. on the workbench until it was just a bare tube, and started on the upgrades as detailed below.
Flocking the inside of the Optical Tube
A popular and cheap modification with noticeable benefits is to apply self-adhesive flocking material to the inside of the optical tube. Flocking material is thin black felt, with a soft fluffy texture, which does not reflect light. The standard black paint which Skywatcher use is still quite reflective in comparison, which means any stray light inside the telescope can bounce around and affect the image quality, especially the contrast. As you can probably imagine, applying rolled up sticky material inside the tube is a bit of a challenge, it wants to stick to everything except where you want it to go! The primary mirror cell and secondary mirror holder are a tight fit so gaps need to be left at both ends for these, and material needs to be cut away for the focuser and various screw holes.
Primary Mirror Mask
The 150mm primary mirror is held with rubber clips inside the primary mirror cell at the base of the O.T.A. The first step was to remove the mirror from the cell because it was covered in a thick layer of dust and grime, which was carefully washed off using soft cotton wool and copious amounts of pure water. The mirror surface is very delicate so harsh chemicals and cleaning pads can’t be used, only new cotton wool and pure (distilled) water from a clean container. Next, the cobwebs and dust were cleaned out from the mirror cell and adjustment mechanism, ready for another coat of black paint. Skywatcher had already roughly painted some parts of the mirror cell, but there was definitely room for improvement. I used Humbrol No.33 Matt Black enamel paint, because it dries to a really dull matt finish. The mirror and cell were reassembled with the addition of a Backyard Universe Primary Mirror Mask, specially designed for Skywatcher 150mm Newtonians and CNC machined from aluminium. The purpose of the mirror mask is to hide the rubber mirror clips, which cause very obvious distortion to the star diffraction patterns in photographs taken. It seems strange that a telescope intended for photography doesn’t come with a mirror clip mask as standard. Once reassembled the mirror cell was installed back into the optical tube using new screws.
Crayford dual-speed focuser
The Explorer series of Newtonian telescopes are all supplied with a Crayford style focuser which uses a smooth roller shaft, instead of a rack and pinion style focuser. Unfortunately the type used is of cheap quality. The more expensive Quattro series of Newtonian telescopes have a better quality Crayford focuser which is more accurately built. I will probably replace the entire focuser at some point, but for now a few improvements can be made which will make it more suitable. I started by cleaning and painting the drawtube matt black to reduce stray light reflections, as for some strange reason they are supplied painted silver, which is probably the worst colour to use inside a telescope. The poor quality eyepiece holder was unscrewed and a better quality holder with a brass compression ring was installed, because I’ll be using a coma corrector, filter drawer and camera which is a heavy assembly that needs holding securely. The focuser assembly is also a big source of light leaks into the O.T.A. so when reinstalling it I used thin strips of the self-adhesive flocking material as gaskets between the components, and new M4 threaded screws to replace the low quality originals. Finally I painted the ends of the screws and the nuts inside the tube matt black. There is a considerable gap between the body of the focuser and the draw tube which lets in a lot of stray light, some people use black electrical tape to cover it up, but i’m planning to make a flexible boot from black vinyl material which will hopefully look neater.
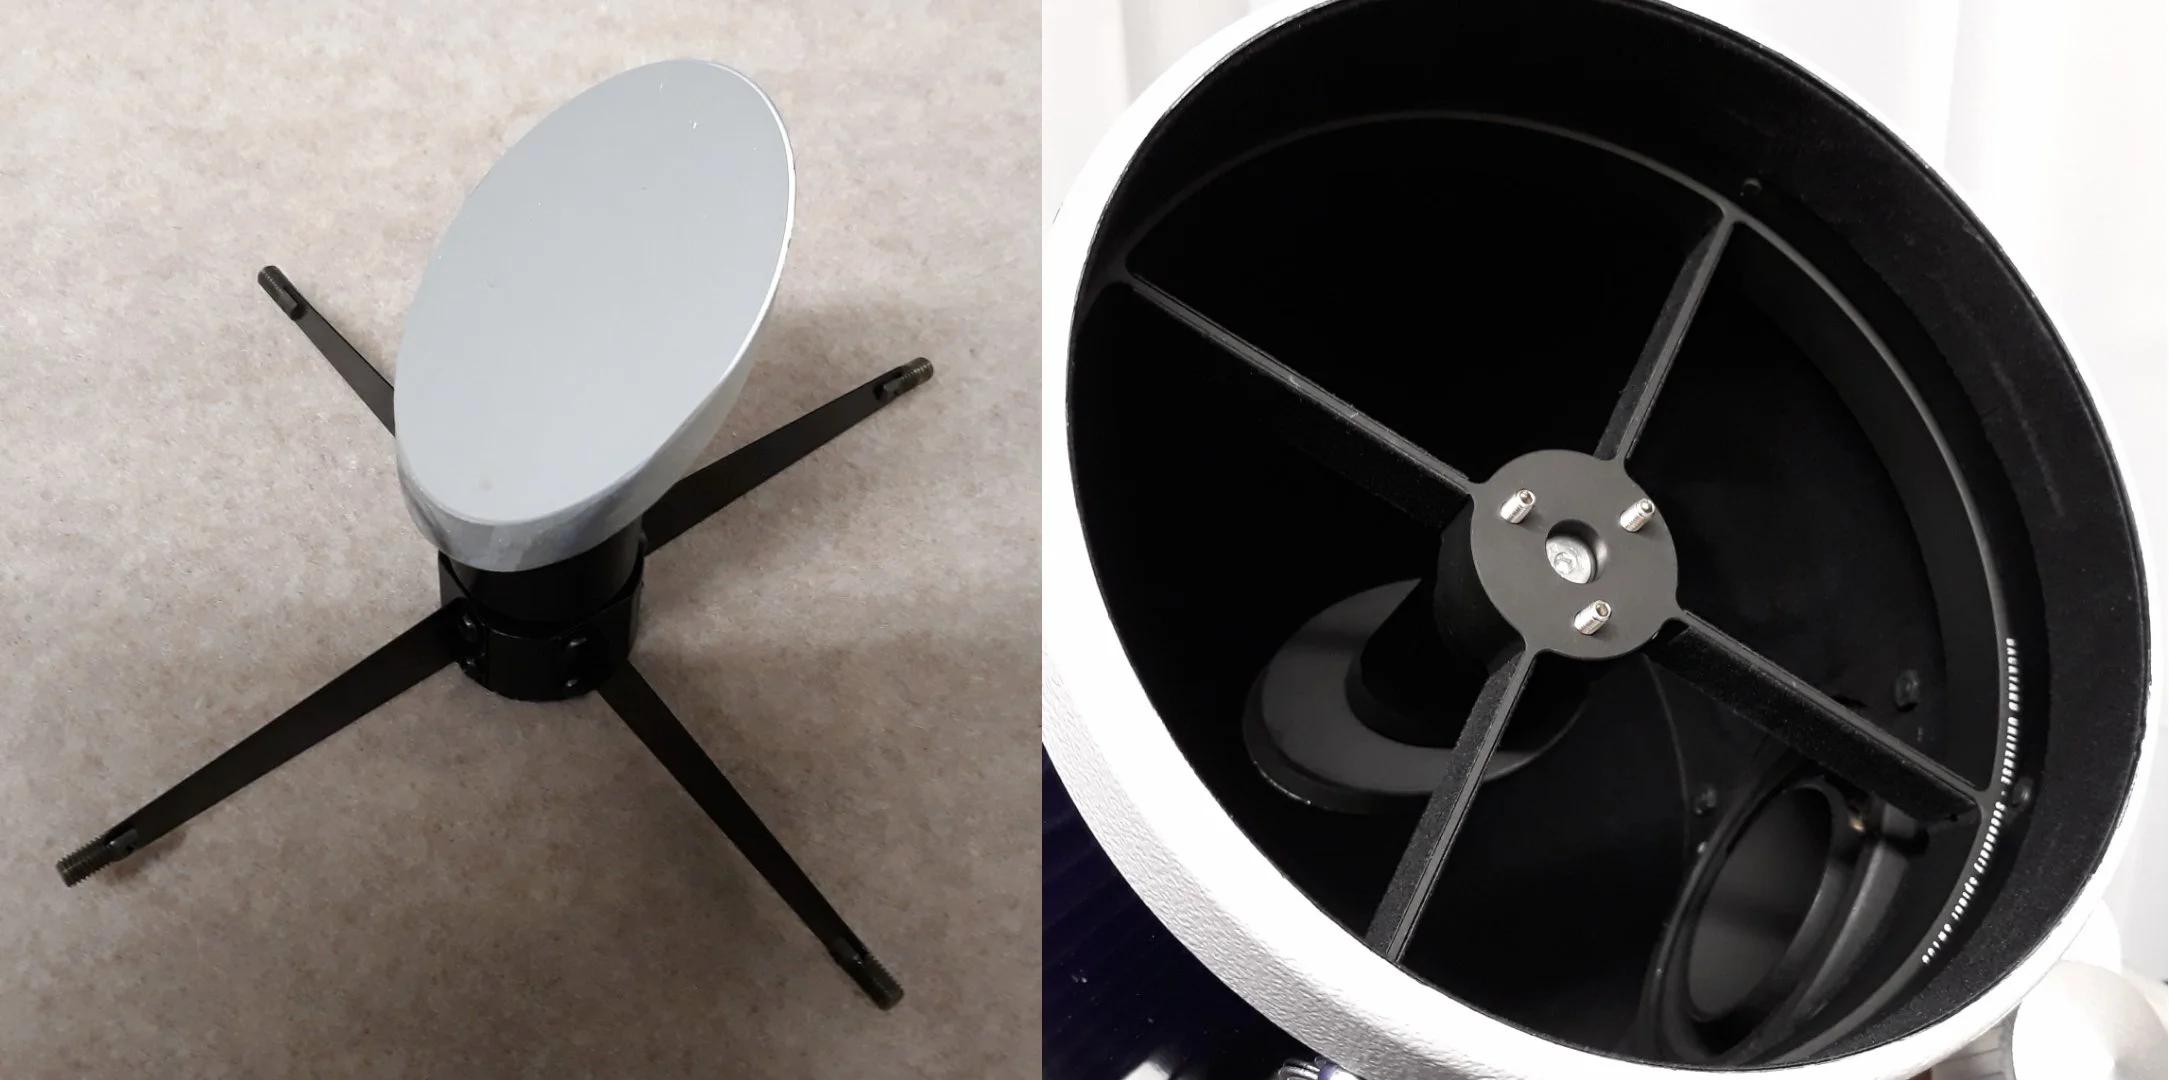
Secondary Mirror
The secondary mirror is held in place by an assembly often called a spider. The spider is what causes the obvious diffraction spikes on bright stars which make photos taken using Newtonian telescopes instantly recognisable. The standard spider assembly supplied with most Skywatcher Newtonians is a cheap and flimsy device which is easily twisted or distorted, and also regularly loses collimation (optical calibration of the telescope mirrors). Thankfully a CNC machined spider assembly for this exact model of telescope is available from Backyard Universe, which makes collimation much easier and also produces much better looking diffraction spikes. Before installing, I applied flocking material to the spider vanes to further reduce unwanted reflections. The spider came with new stainless steel hardware for attaching the secondary mirror, and to secure it inside the O.T.A. The secondary mirror itself was treated to a coat of matt black on the sides and back, before being installed ready for collimation. Finally the white plastic end trim was screwed back into place using new M4 screws and washers, the screw ends were painted matt black and the inside of the end trim covered with flocking material.
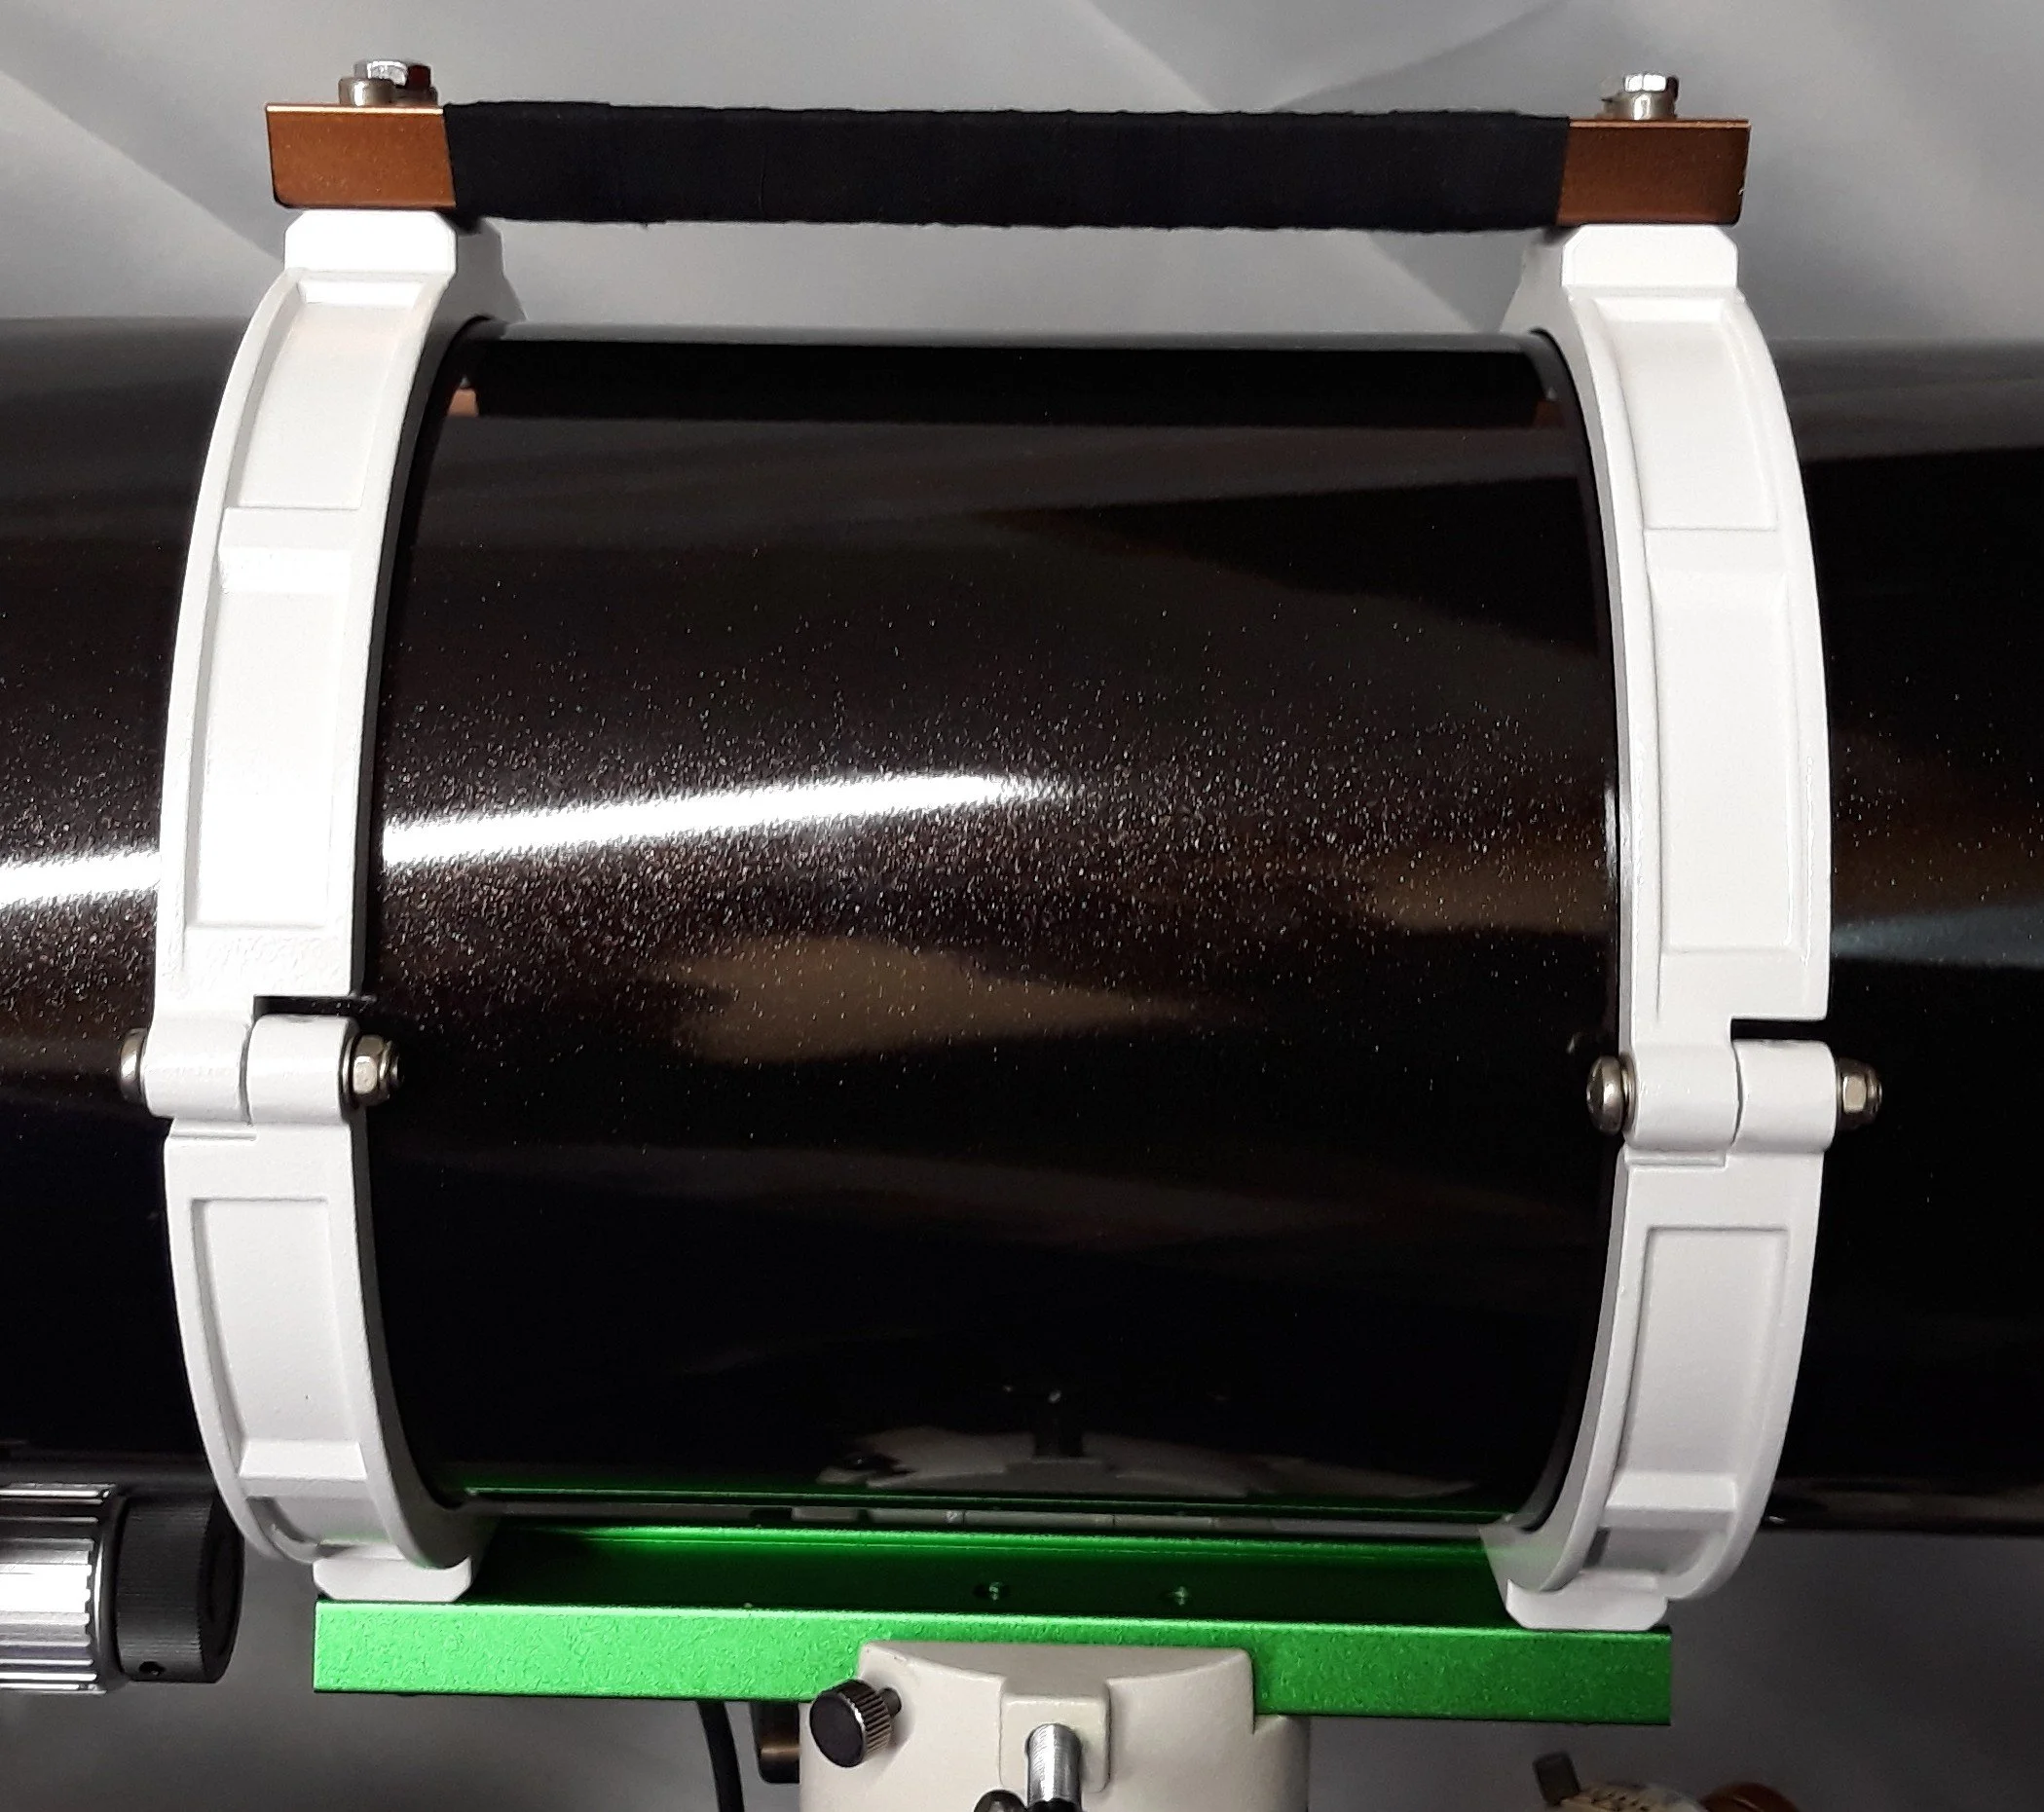
Tube rings
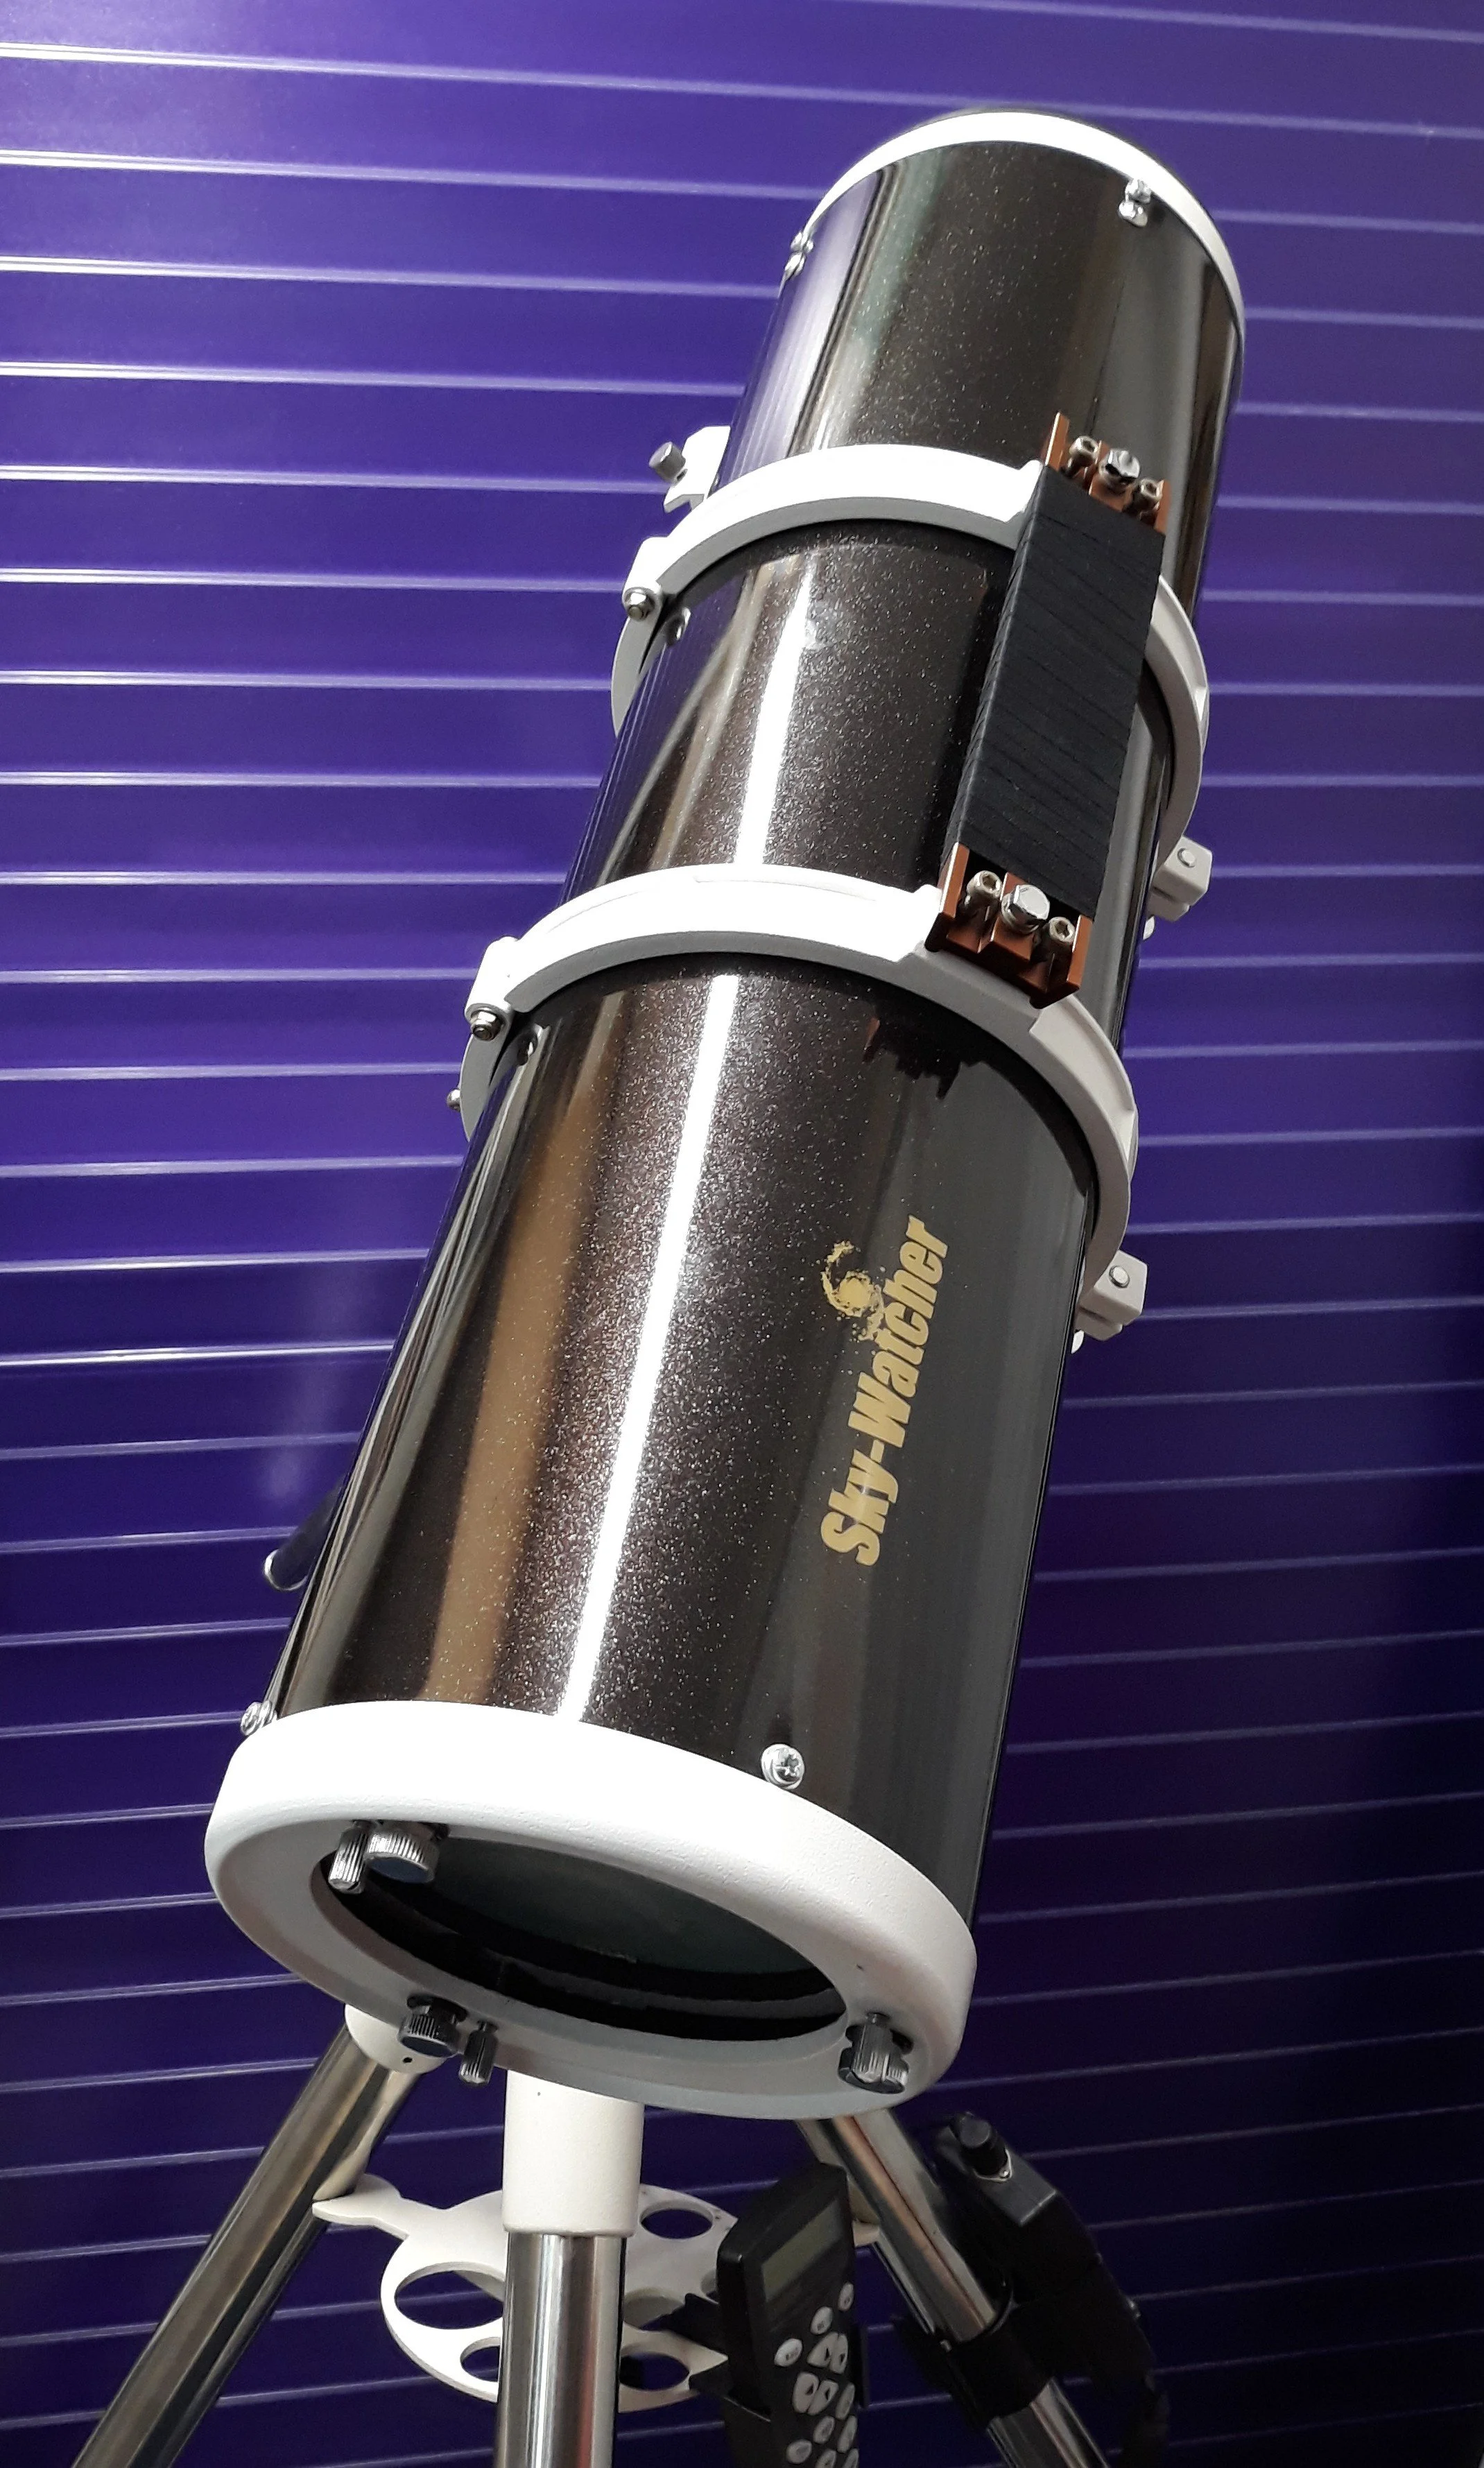
The O.T.A. is attached to the EQ5 Equatorial Mount in the standard way, with a pair of tube rings bolted to a Vixen type dovetail bar. The tube rings are actually not too bad, they were already lined with flocking material to stop them scratching the paintwork of the O.T.A. I’m not sure if they came from the factory like this or if the previous owner modified them. The Vixen dovetail bar was anodised in a rather unappealing gold/bronze colour, indicating this is quite an old telescope, the new ones are anodised bright green. I moved the original dovetail bar to the top of the tube rings and wrapped it with grip tape to become a carry handle, and installed a new (green) dovetail bar at the bottom. Doing this makes the tube ring assembly more rigid, which then helps make the telescope itself more rigid.
This concludes the first stage of work to enhance the telescope, in the next article I will tackle collimation, solving light leaks and installing dew prevention. I hope the information in this article helps anyone who is also trying to maximise the performance of their Newtonian telescope for astrophotography. Clear skies!
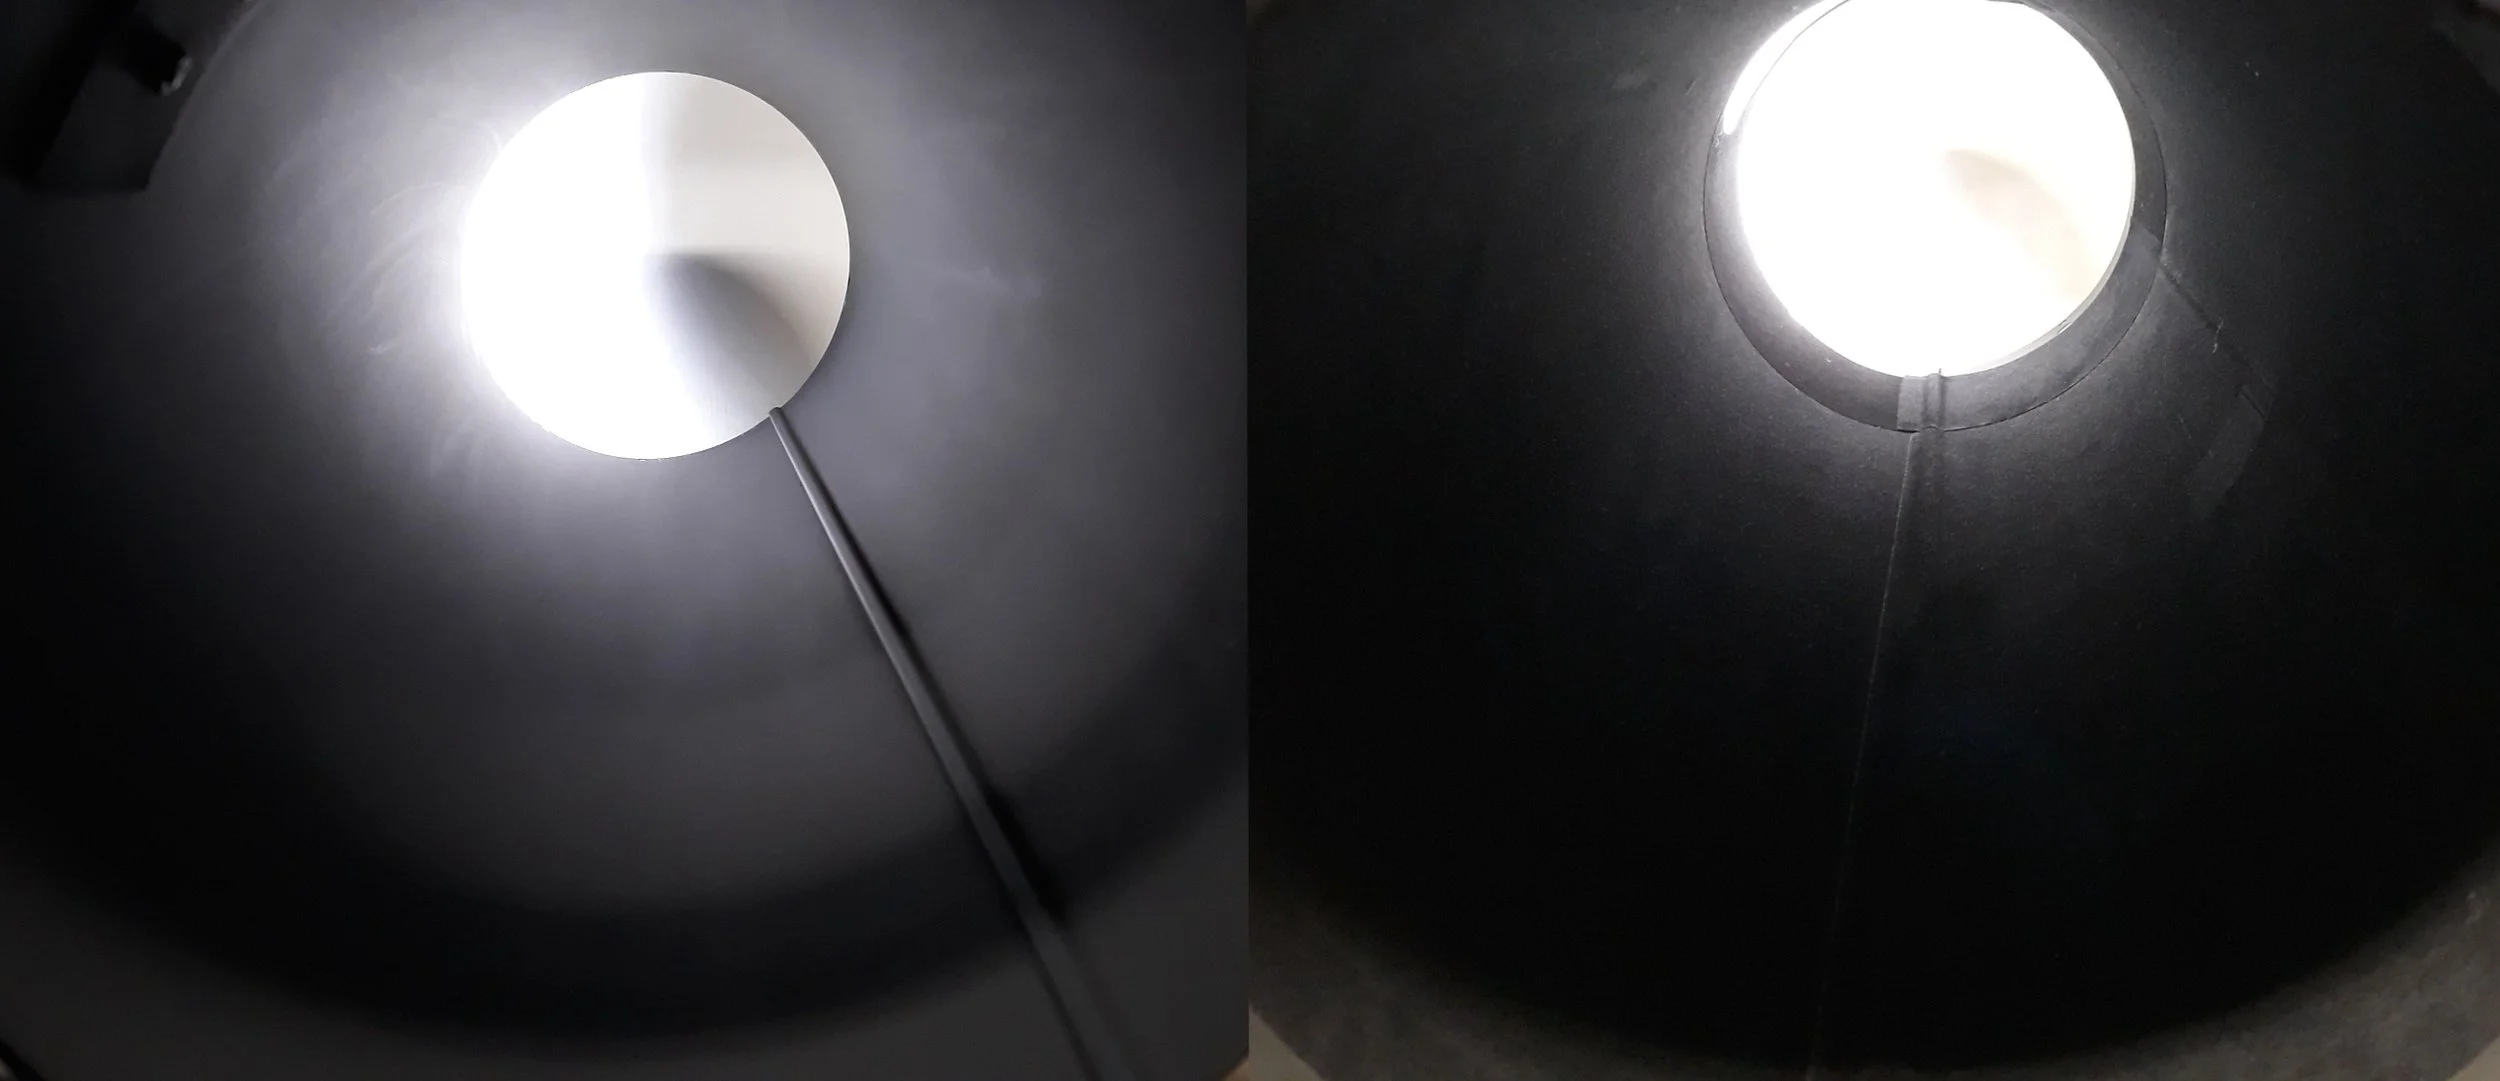
Explorer 150P-DS bare optical tube before and after flocking material
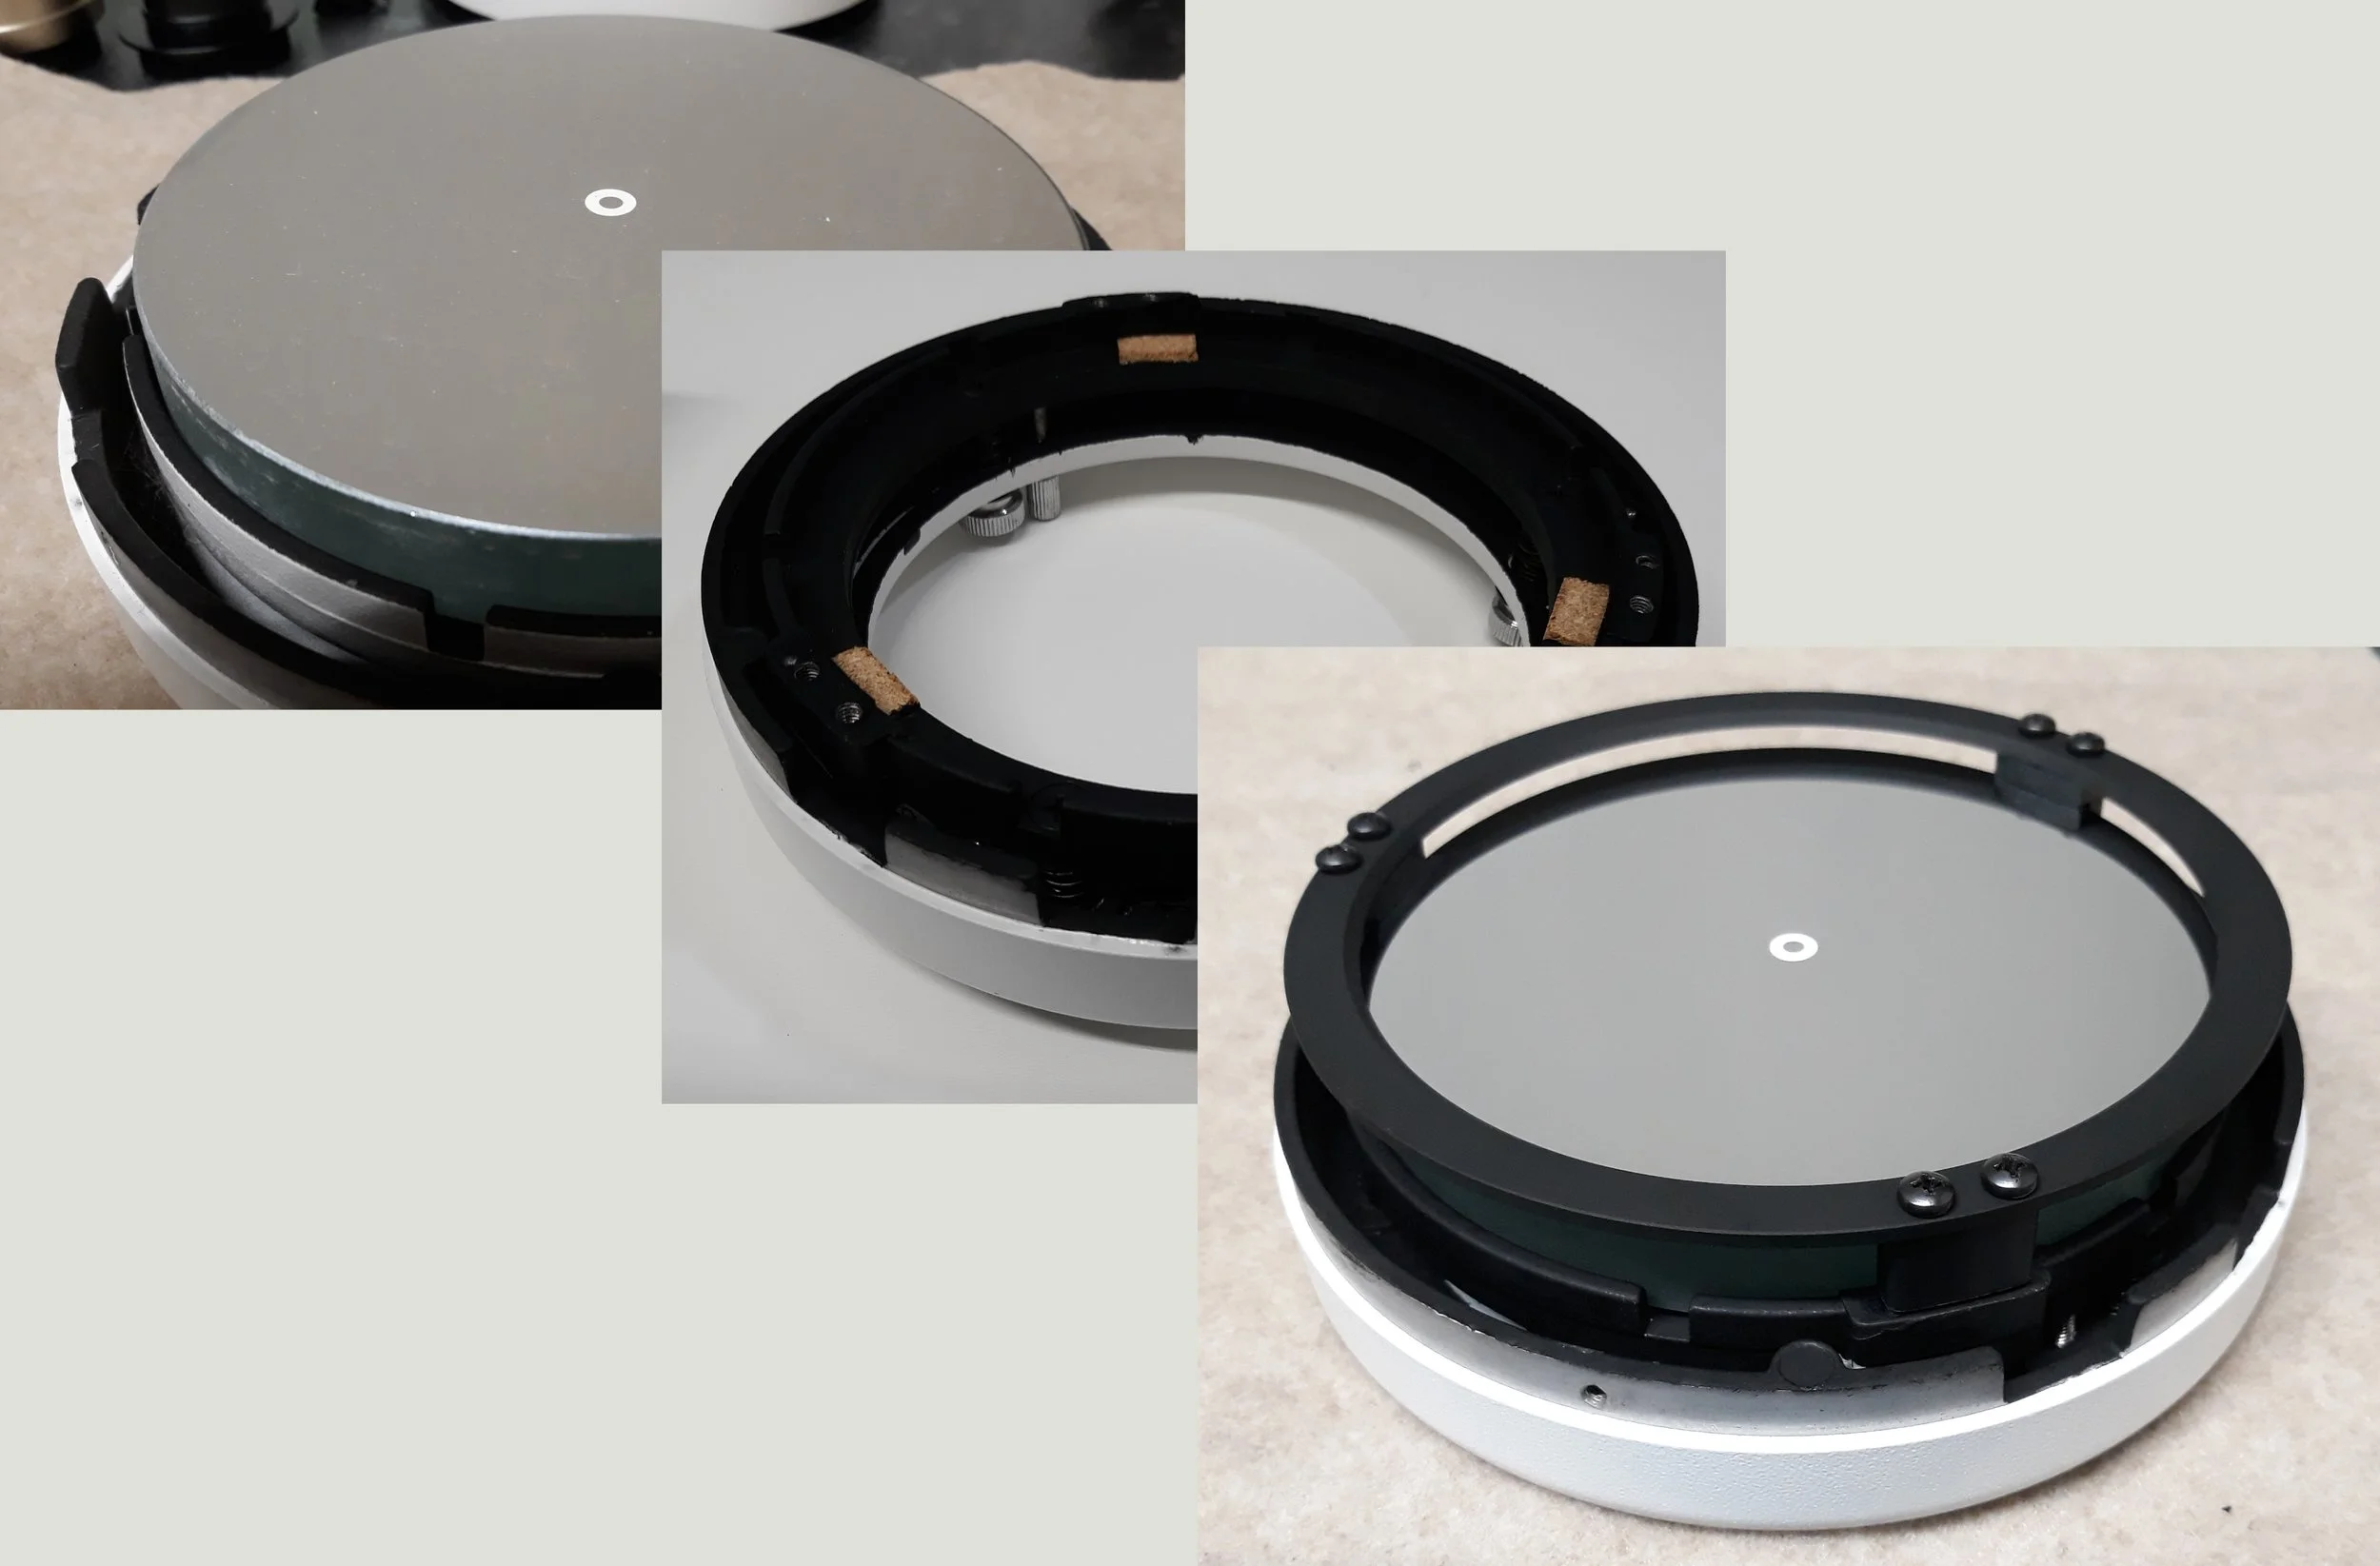
Primary Mirror Cell cleaning, painting, installing Mirror Clip Mask
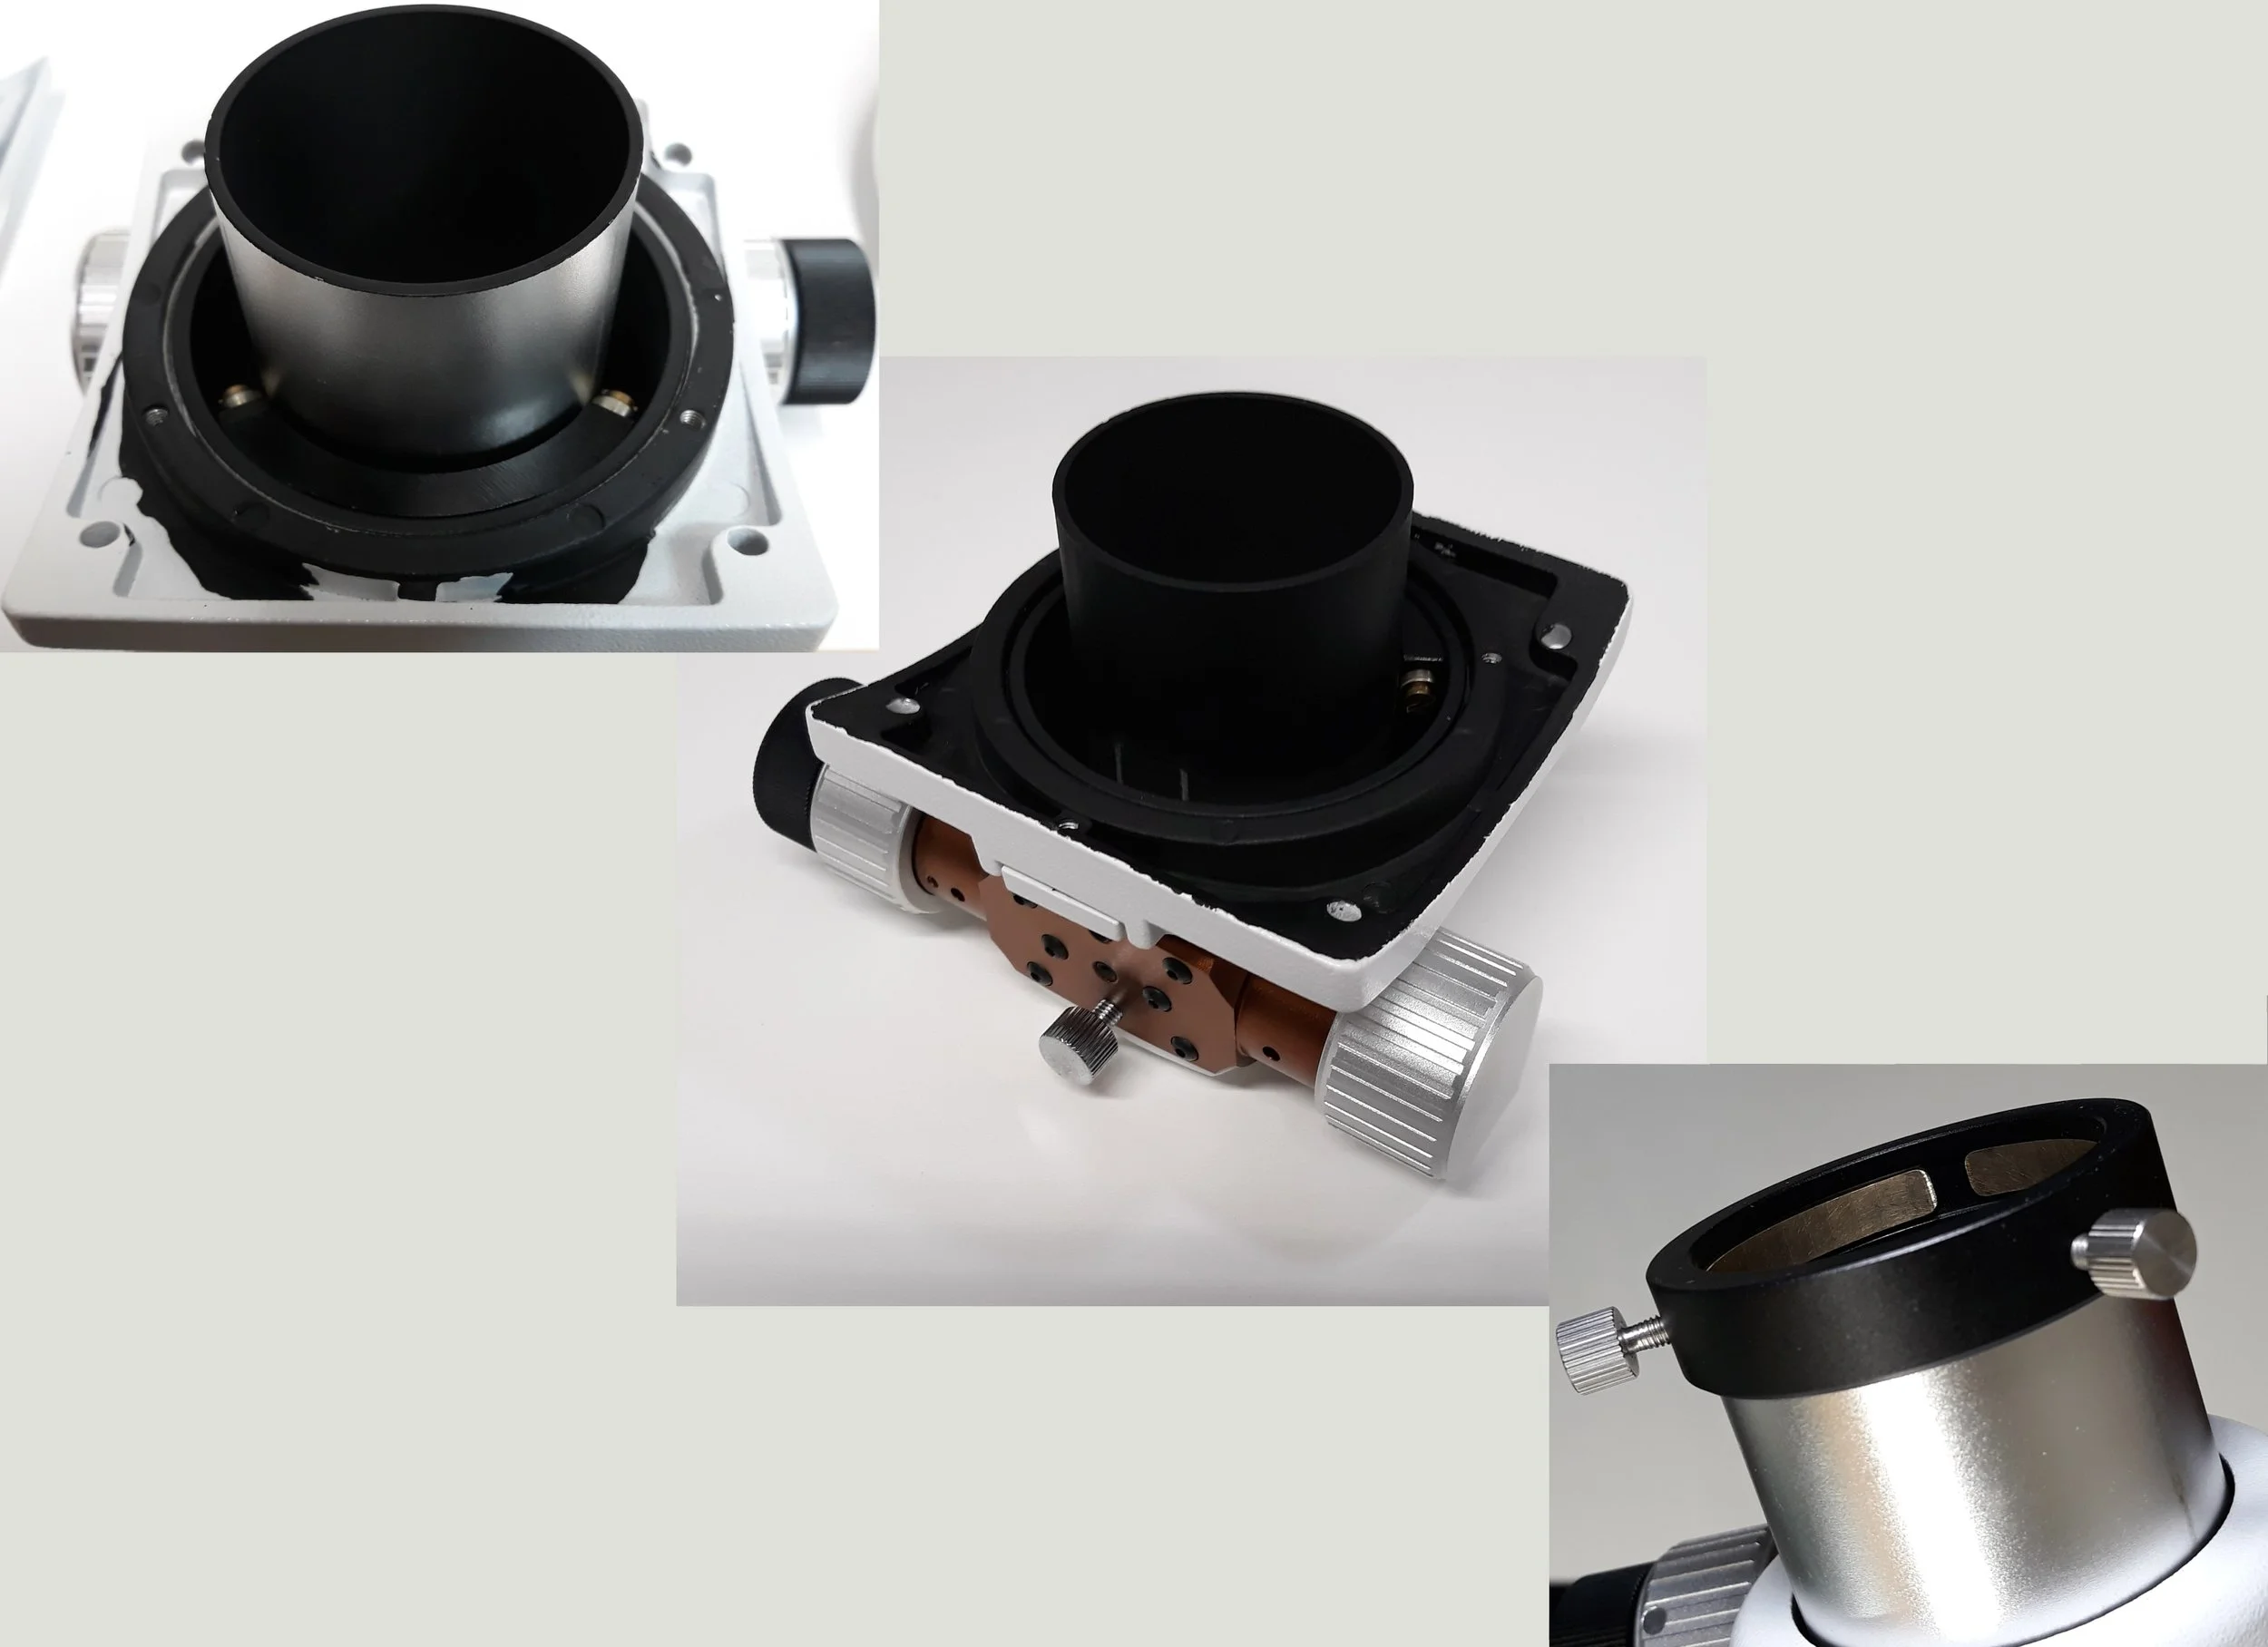
Crayford focuser before and after painting, replacing eyepiece holder
Secondary Mirror assembly before and after
Tube ring assembly with twin Vixen type dovetail bars