

Enhancing the Skywatcher Explorer 150P-DS (Part 2)
Following on from the first batch of modifications made to my second-hand Skywatcher Explorer 150P-DS Telescope to improve it’s performance for Astrophotography, in this article I will go over the latest changes and improvements which have been carried out.
In the previous article I explained the major upgrades and modifications which were carried out to address some of the flaws with this budget Newtonian telescope. After these initial changes had been made, a rare clear night gave the opportunity to test the telescope and see what further changes or adjustments were required.
Assembling the rig
With the O.T.A. assembled and clamped in place on a Skywatcher EQ5 GoTo mount, the next step was to install all the various imaging components, cables and accessories needed to create an imaging rig.
Due to recently selling my ASiair controller, obtaining a power and USB hub was the first priority, as it needed to be installed first so that cable lengths could be worked out. The Svbony SV241 Power hub seemed the best budget option, and a good condition second-hand one was sourced from eBay. Using a USB hub like this means only one data cable is required from the rig to the laptop, instead of multiple cables from all the separate components.
For autoguiding a basic Svbony 30mm guide scope was paired with the popular ZWO ASI120MM monochrome guide camera. Ideally Newtonians benefit from using an off-axis guider rather than a traditional guide scope, but | was keen to keep costs down, and can always upgrade this setup in the future.
My Astromodified Canon EOS R Mirrorless camera with customised filter holder fitted straight onto the focuser drawtube using a Canon EF/M48 thread adapter, screwed onto the 0.9x reducer/corrector which is designed specifically for this telescope. The reducer/corrector is essential for good quality images with sharp stars right into the corners, especially with large camera sensors. Realistically my full-frame Canon sensor is a bit too big for this setup, APS-C or smaller would be better matched.
In keeping with the budget theme, rather than purchasing an expensive cover for the primary mirror end of the tube to keep out stray light, a cheap black waterproof beanie hat was used. The waterproof ones have a plastic internal lining which is excellent for blocking light. Data cables and power leads were routed as required and secured in place with cable ties and velcro straps.
Finally a flexible dew shield was added, partly to help keep the mirrors clear of dew but mainly to reduce stray light from various neighbour’s outside lights!
Selecting a target
With the rather resticted view of the sky from my location, plus the time of year with Galaxy Season just ending and the Summer constellations only just beginning to rise, a particularly difficult first target was chosen. LDN 1235 ‘The Dark Shark’ is a Dark Nebula composed of dust and gas which is challenging to image from light polluted areas, the nebula is very faint and doesn’t emit light so narrowband filters can’t be used. On the plus side, it is situated fairly close to Polaris which means it is visible for much of the year, and pointing the telescope North avoids the worst of the light pollution in my local area.
First Light
The results of the first night of imaging were actually quite positive. As well as using a Newtonian telescope for the first time, I was also using the control software program N.I.N.A. for the first time, so I was expecting plenty of teething problems but the whole session went remarkably smoothly. N.I.N.A. is much more advanced than the ASiair which had previously been my control system of choice, luckily there are plenty of excellent tutorials available on YouTube.
Looking at the data in Siril revealed some strange artifacts/internal reflections and vignetting, despite all the effort to block and minimise reflections inside the O.T.A. The vignetting is to be expected, since the full-frame camera sensor is really too large for this sort of system. Even calibrating with flat frames was not enough to neutralise the vignette effect, but I’m happy to crop images for the time being rather than rush out to buy a different camera.
A design flaw with the focuser means that to achieve correct focus with the reducer/corrector and 55mm backfocus to the camera sensor, the end of the focuser drawtube extends quite significantly into the light path inside the telescope. Other users of Explorer Newtonians have also experienced this, and the standard course of action seems to be hacksawing the end off, so that’s exactly what I did.
Surgery
Removing the drawtube from the focuser body is very simple, loosening one grub screw removes tension from the roller and the tube can be pulled out. About 12mm was cut off the inner end with a new fine toothed blade in the hacksaw, and then cleaned up with sandpaper and painted matt black. Shortening the tube does mean that the whole assembly including camera can fall out of the focuser body if the focusing mechanism is wound all the way out, so be careful if you carry out this modification! My Canon camera has a normal camera strap attached and looped over the telescope so that it can’t fall very far if it ever came out. The gap between the focuser body and the drawtube was reduced with a gasket made from flocking material and applied to the rim of the focuser, with the soft flocked side against the drawtube. I will make a gaitor to cover the focuser at some point, because it has several light leaks around the adjustment knobs and the tilt adjuster ring.
Second Light
Fortunately there was another clear night meaning I could test the modification under the same sky conditions and on the same target. Being a Dark Nebula, LDN 1235 benefits from as much integration time as possible anyway so it wasn’t wasted time. Another change I made was to replace the flexible dew shield, which was causing uneven vignetting because it wouldn’t roll into a perfect circle. A homemade rigid dew shield was fabricated from 200mm plastic ventilation duct pipe. Flocking material was used to line the inside and foam blocks used to wedge it into place on the telescope. I left the outside of the dew shield white and added a band of flourescent tape around the end so that it was easier to see in the dark and prevent me bumping into it.
The resulting image was a big improvement over the first attempt, with only a faint reflection showing after background extraction and stretching. Both images had some strange green and purple colour casts, but I think that was due to not using any filters and the amount of localised light pollution rather than a fault with the telescope.
Both night’s data was then combined and processed to create the final image, which I am quite pleased with considering it was the first project tackled with this new setup, and from a Bortle 5 sky location.
In Part 3 I’ll be finishing the customised dew shield, solving the last few light leaks, and then testing all the upgrades by imaging a popular Emission Nebula in the constellation Cepheus. I hope the information in this series of articles helps anyone who is trying to maximise the performance of their Newtonian telescope for Astrophotography. Clear skies!
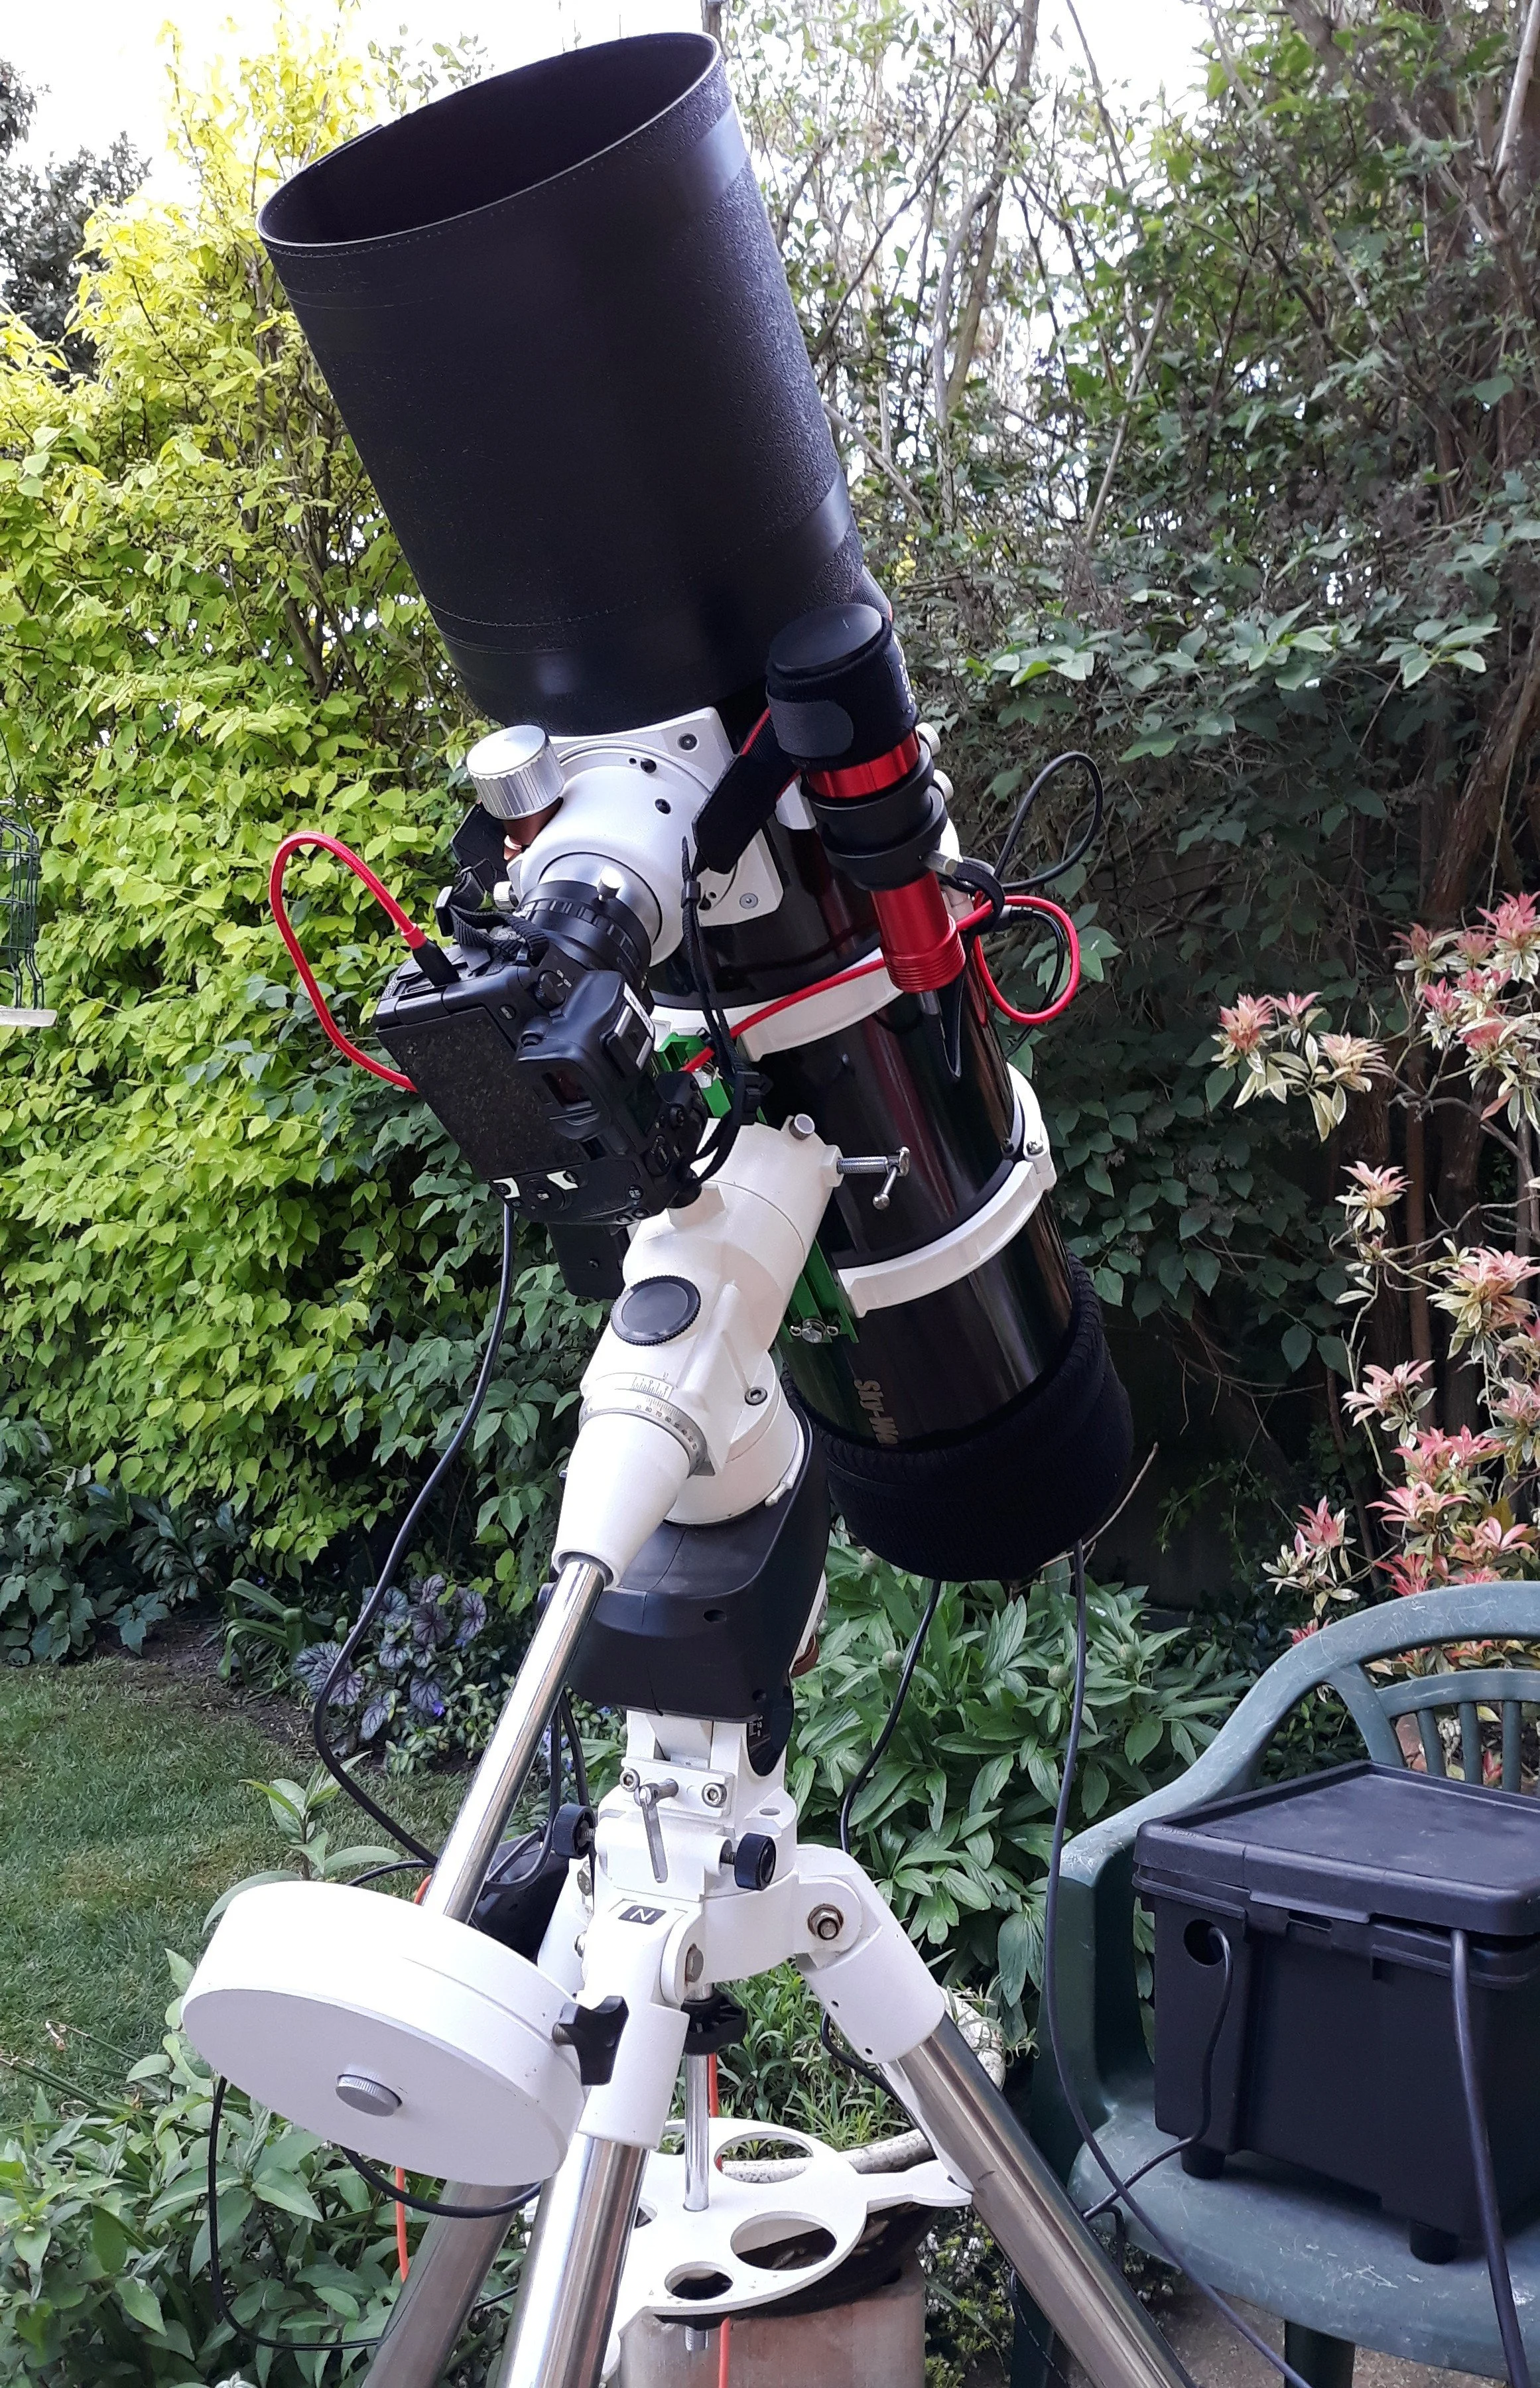

SV241 12vDC Power Hub installed on the top handle
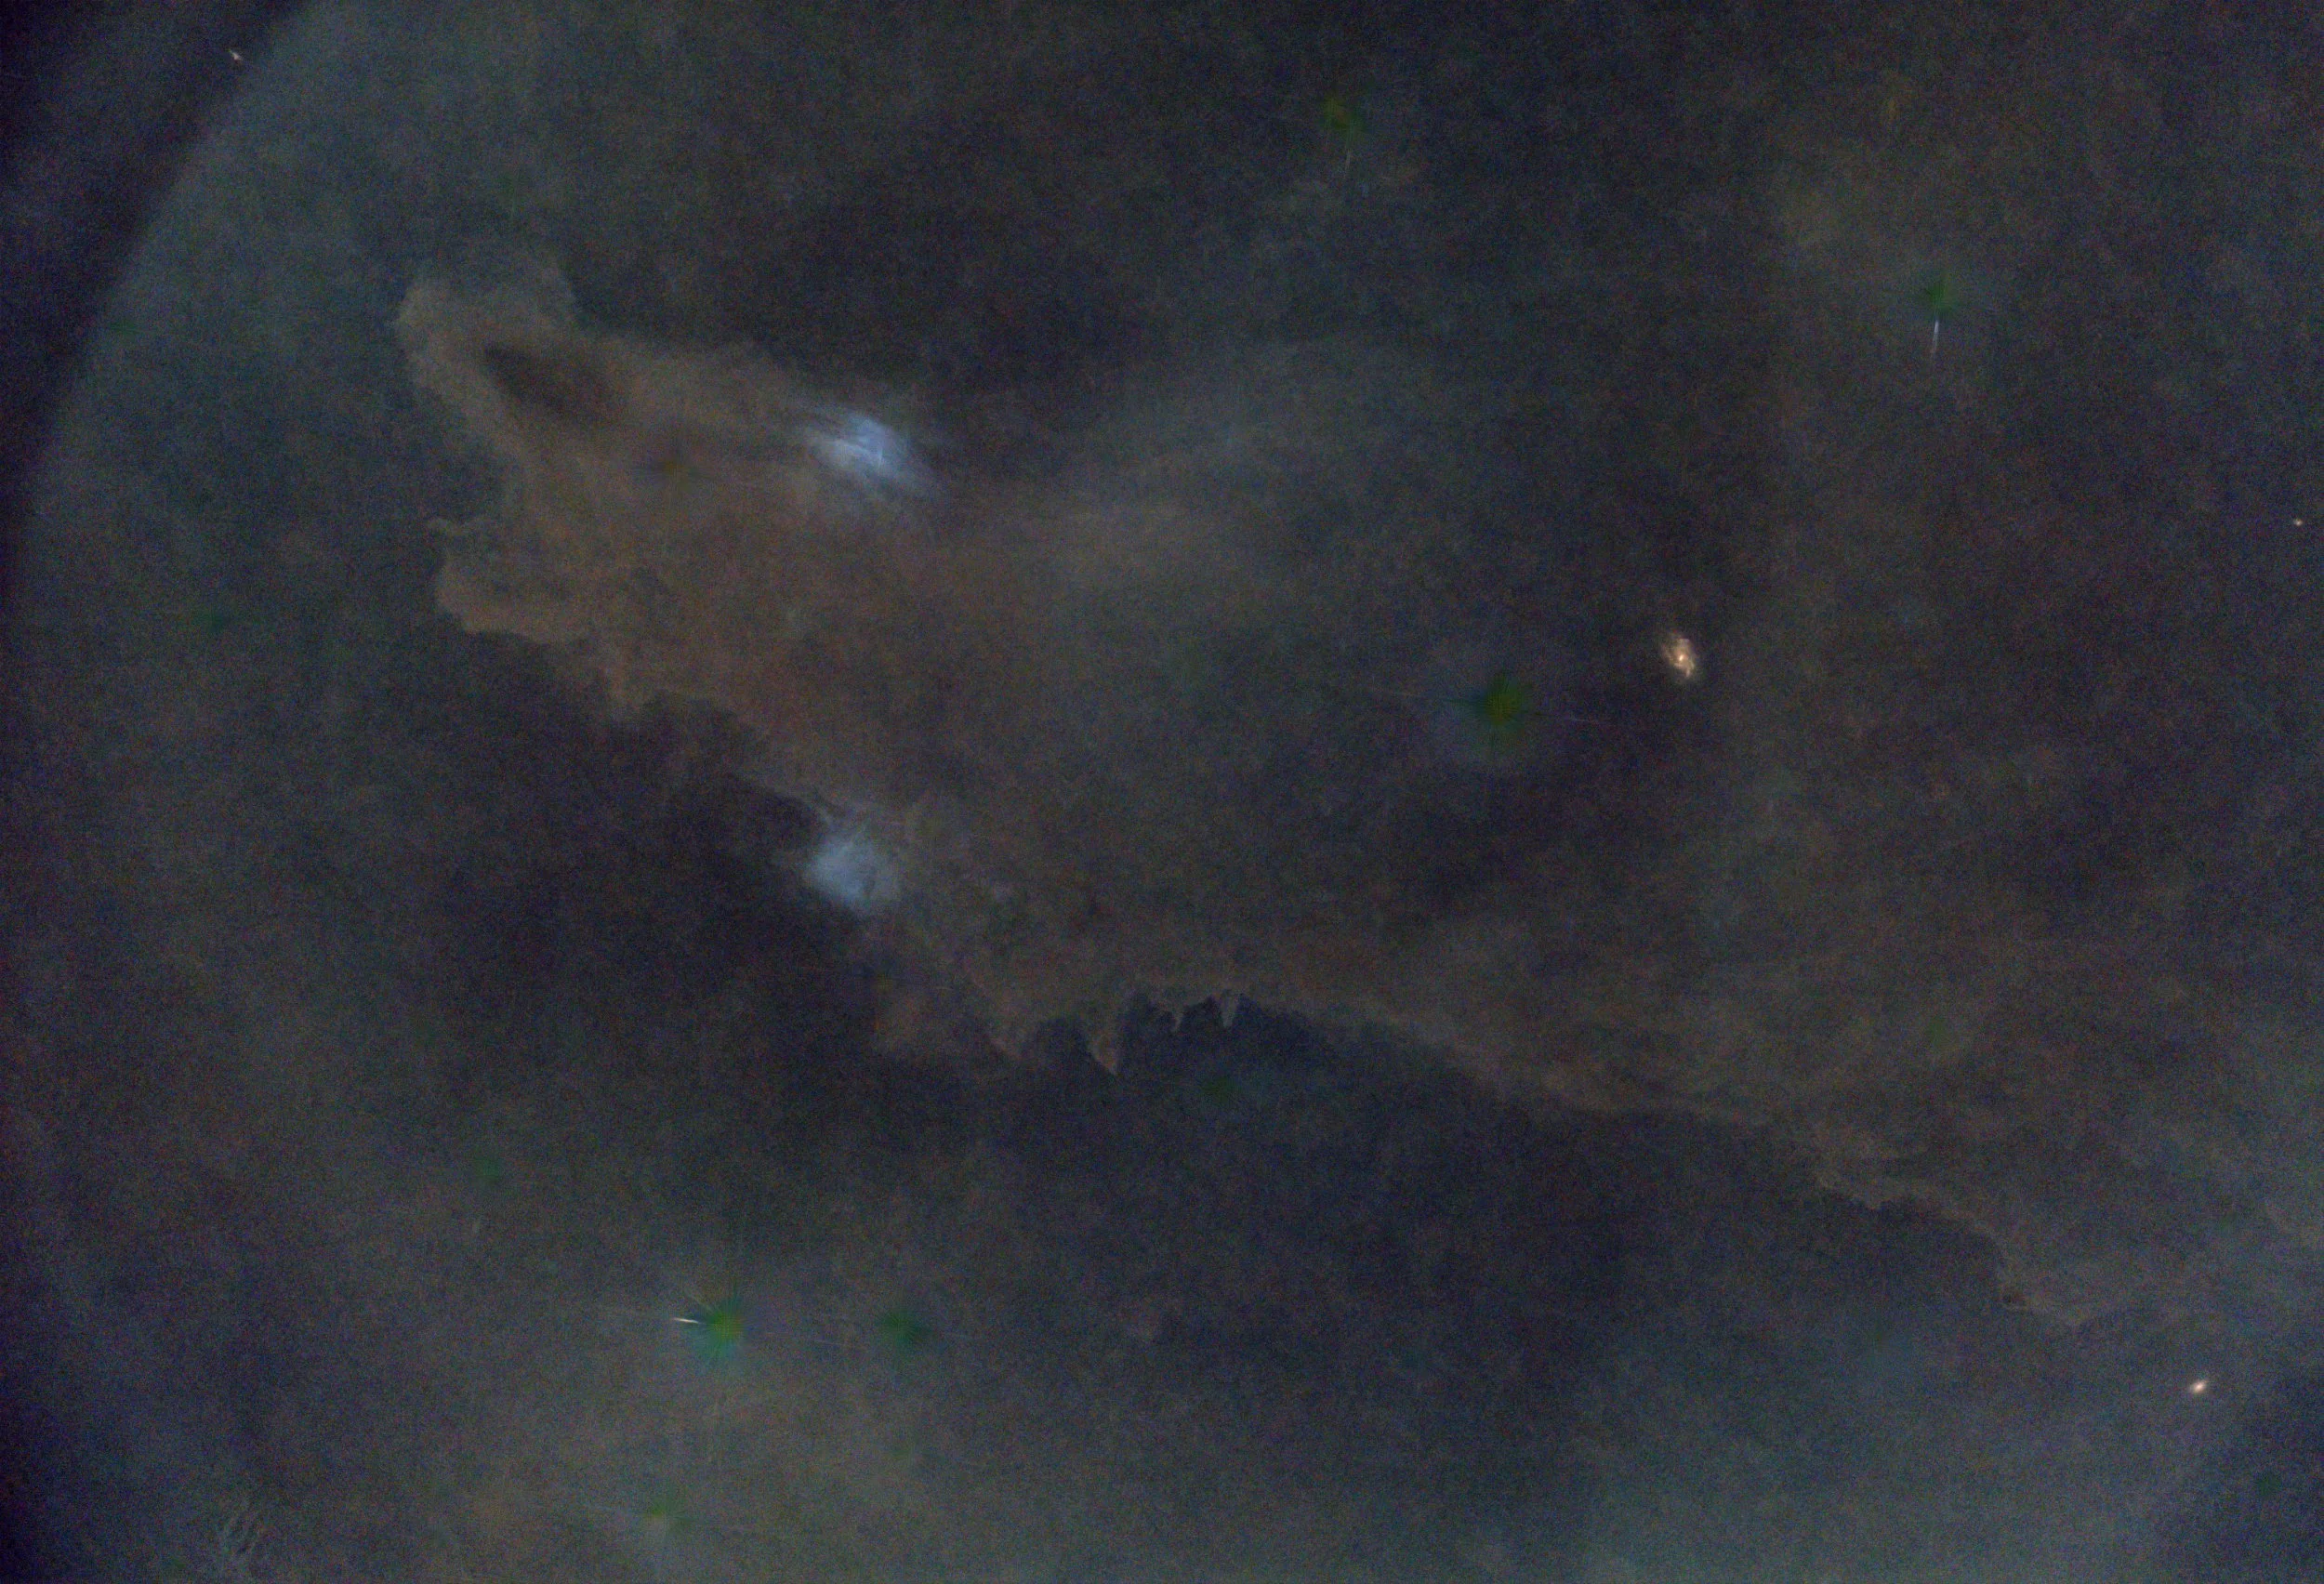
Starless stretched test image showing internal reflections and vignetting
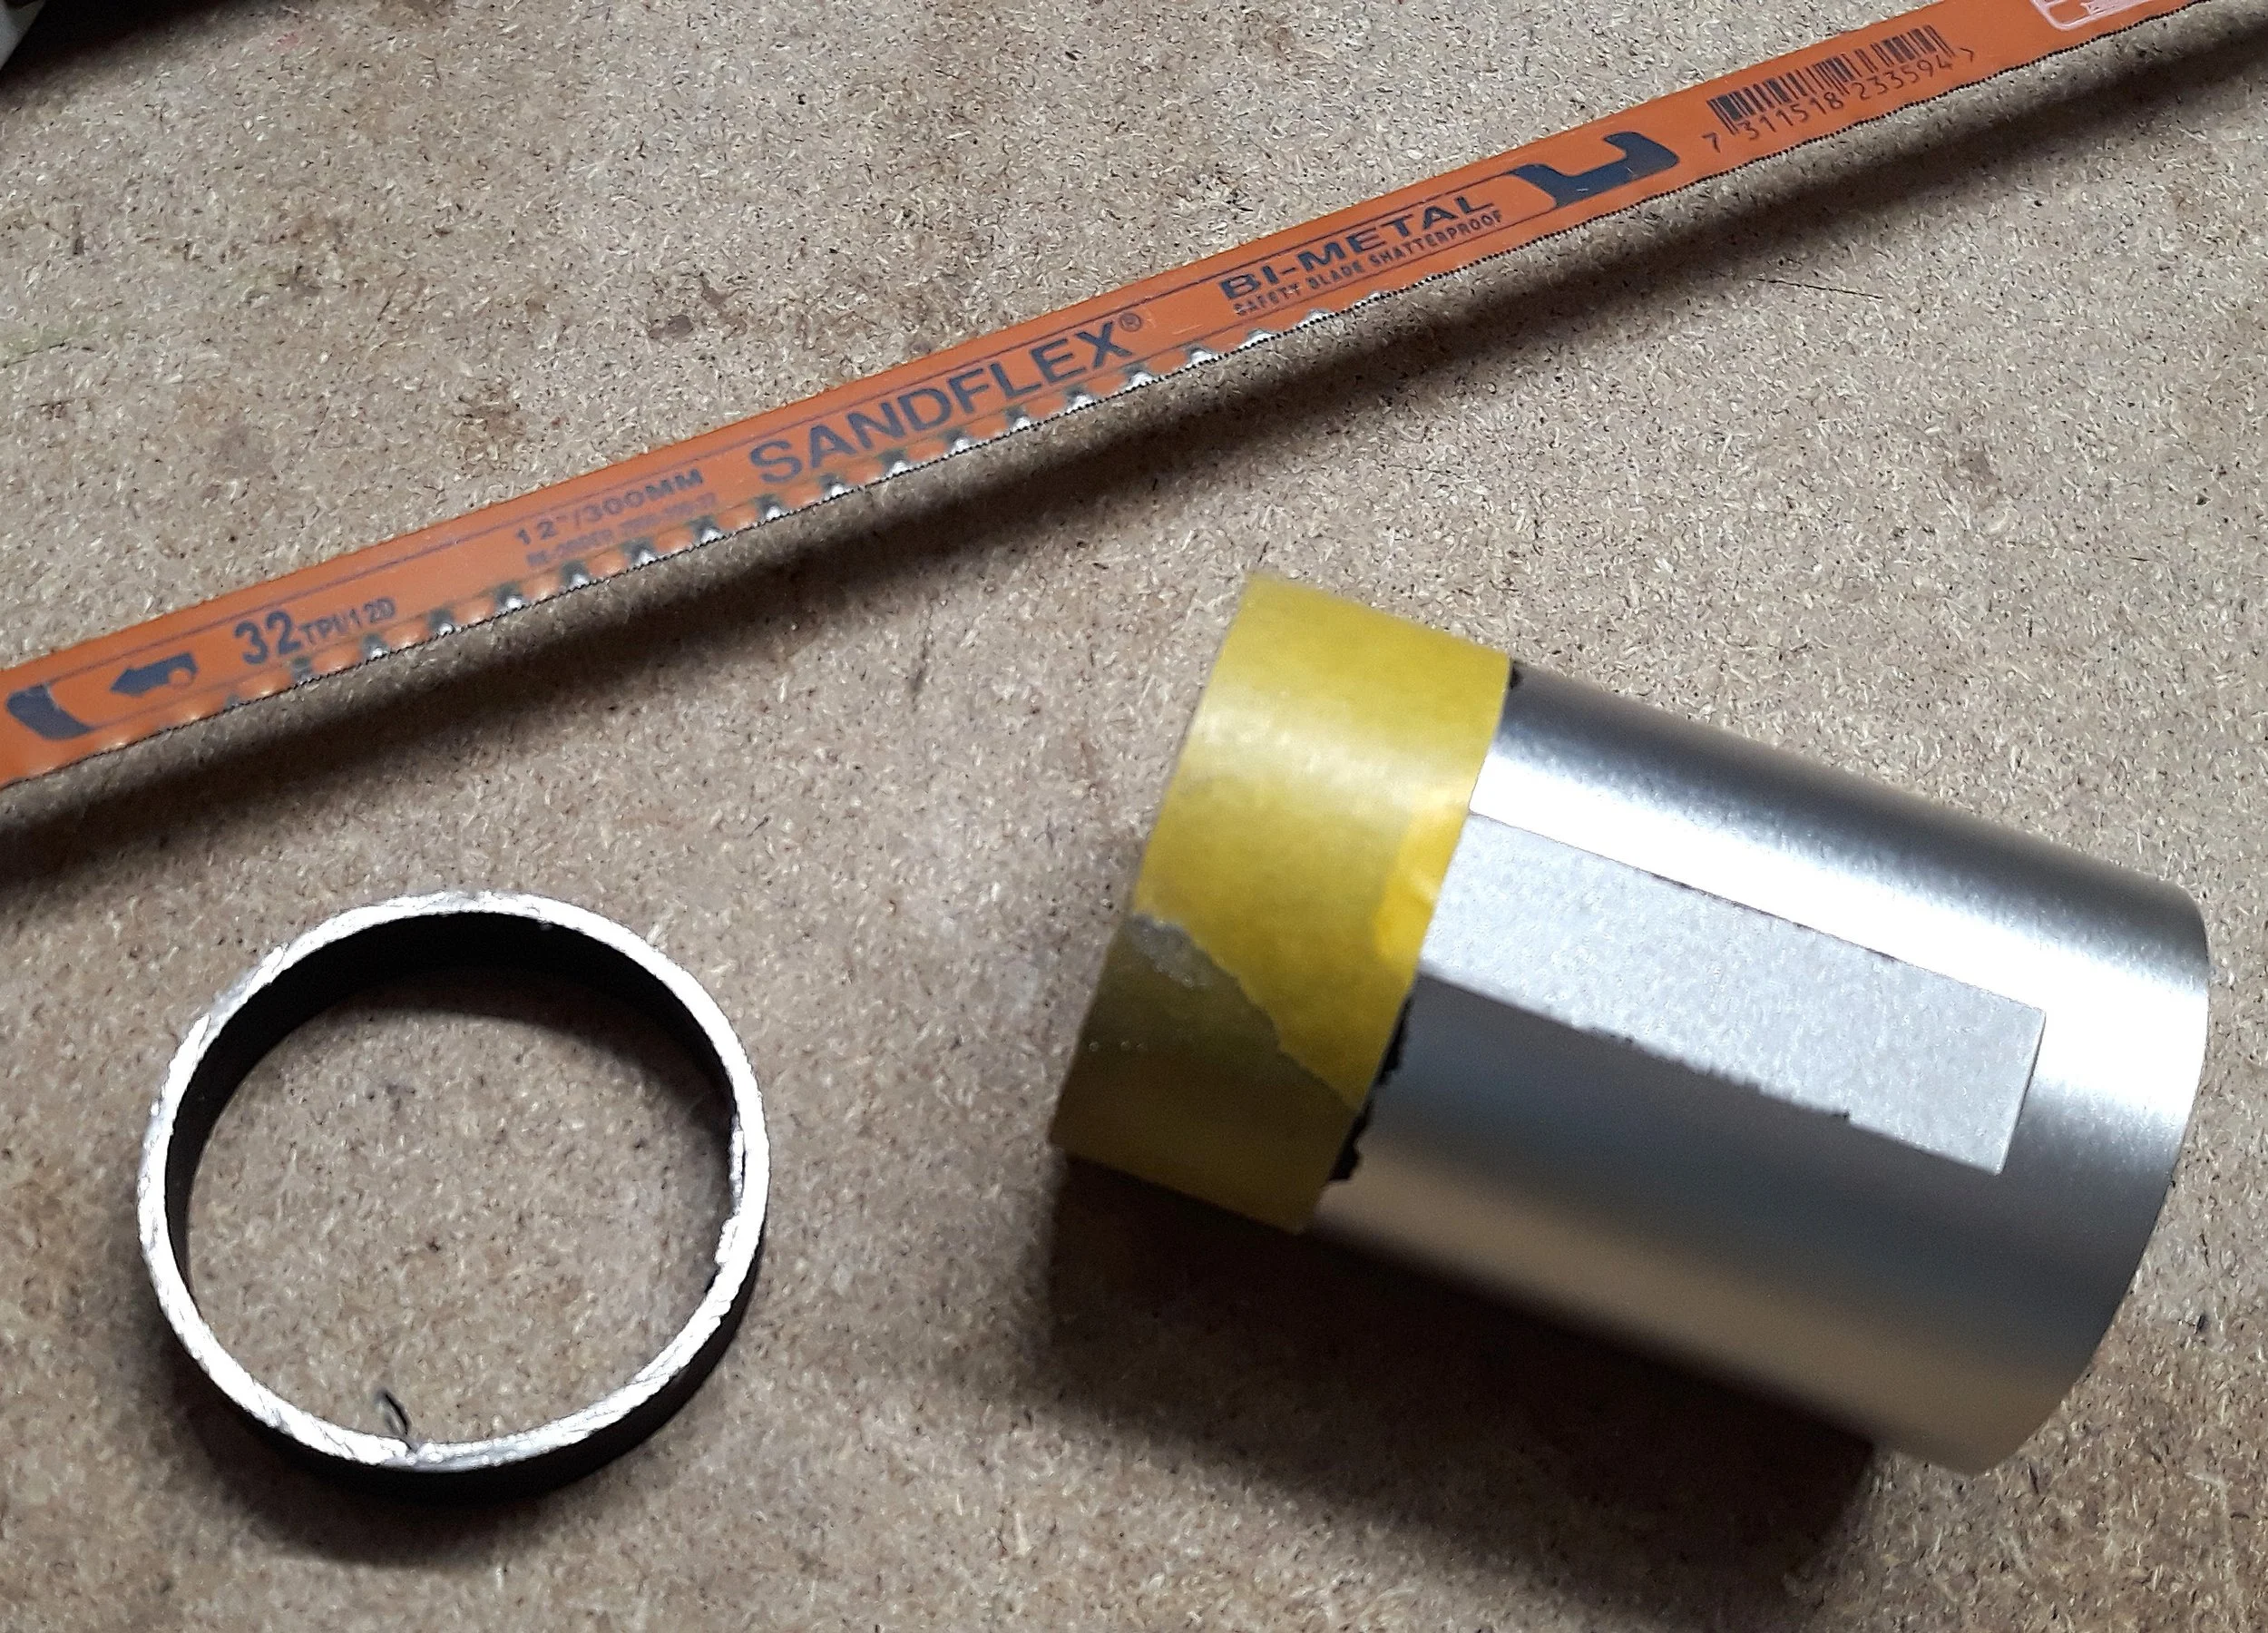
Hacksawing the end off the focuser drawtube
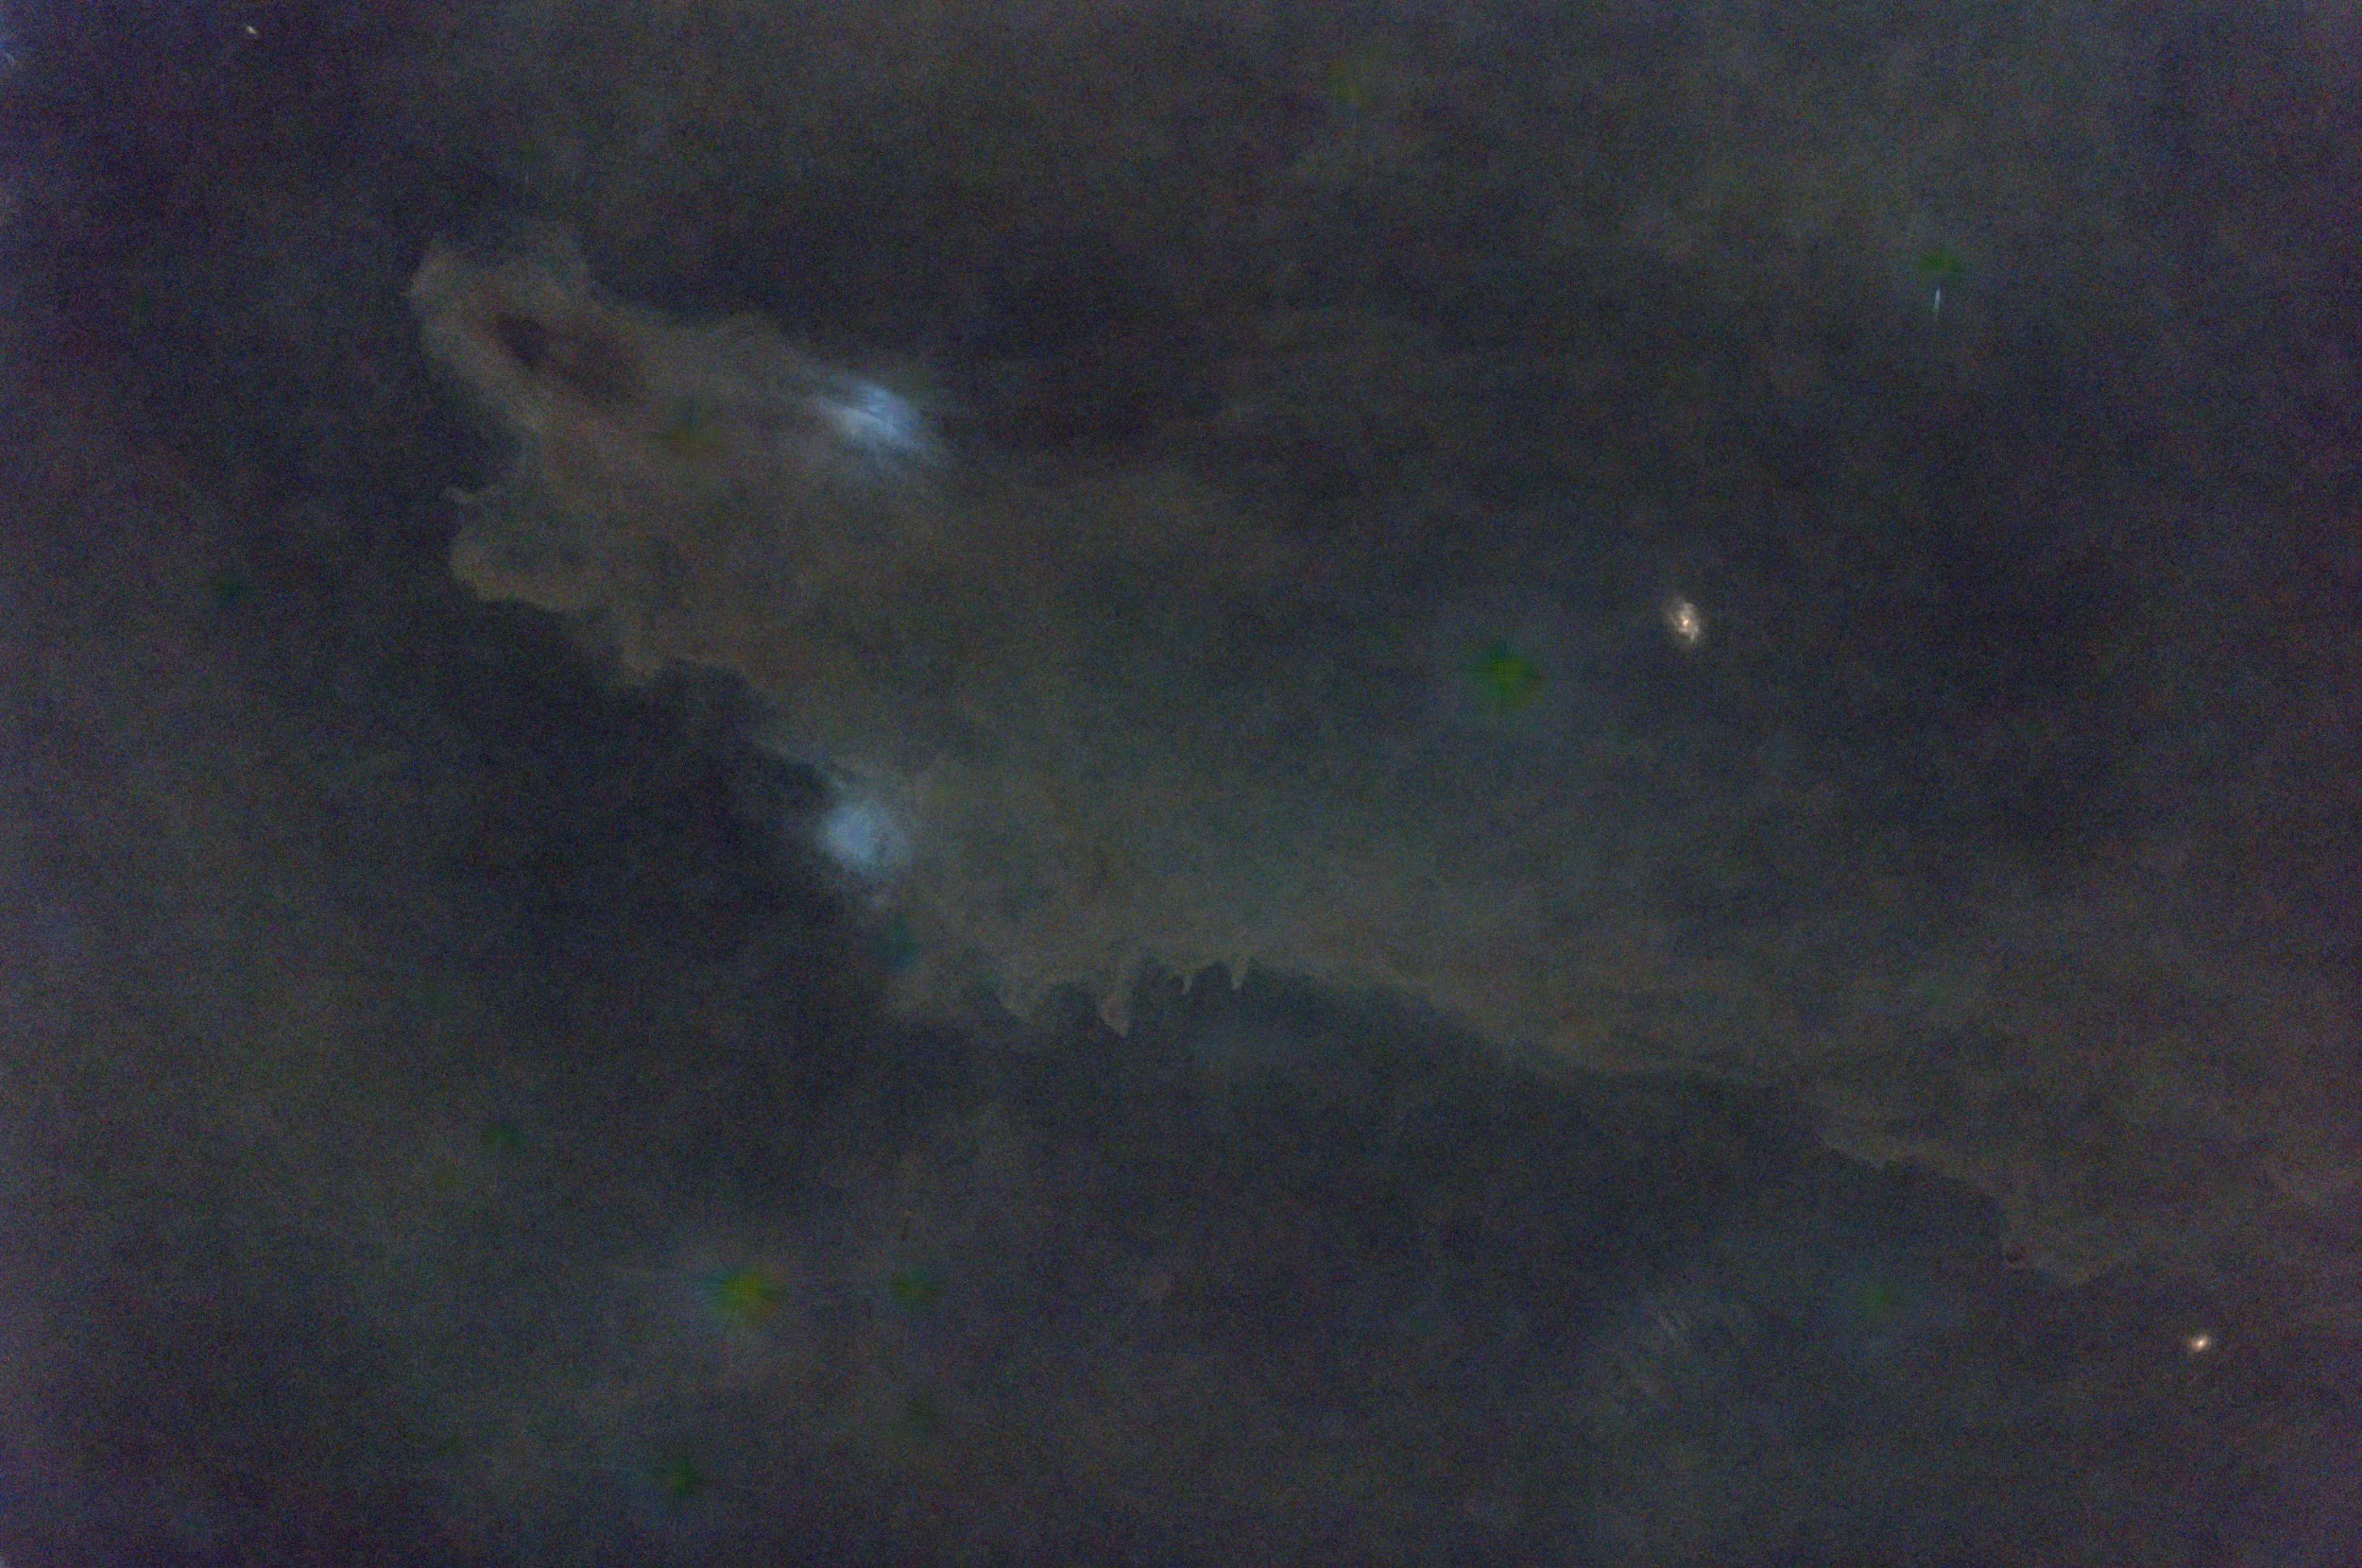
Starless stretched image after shortening the focuser drawtube
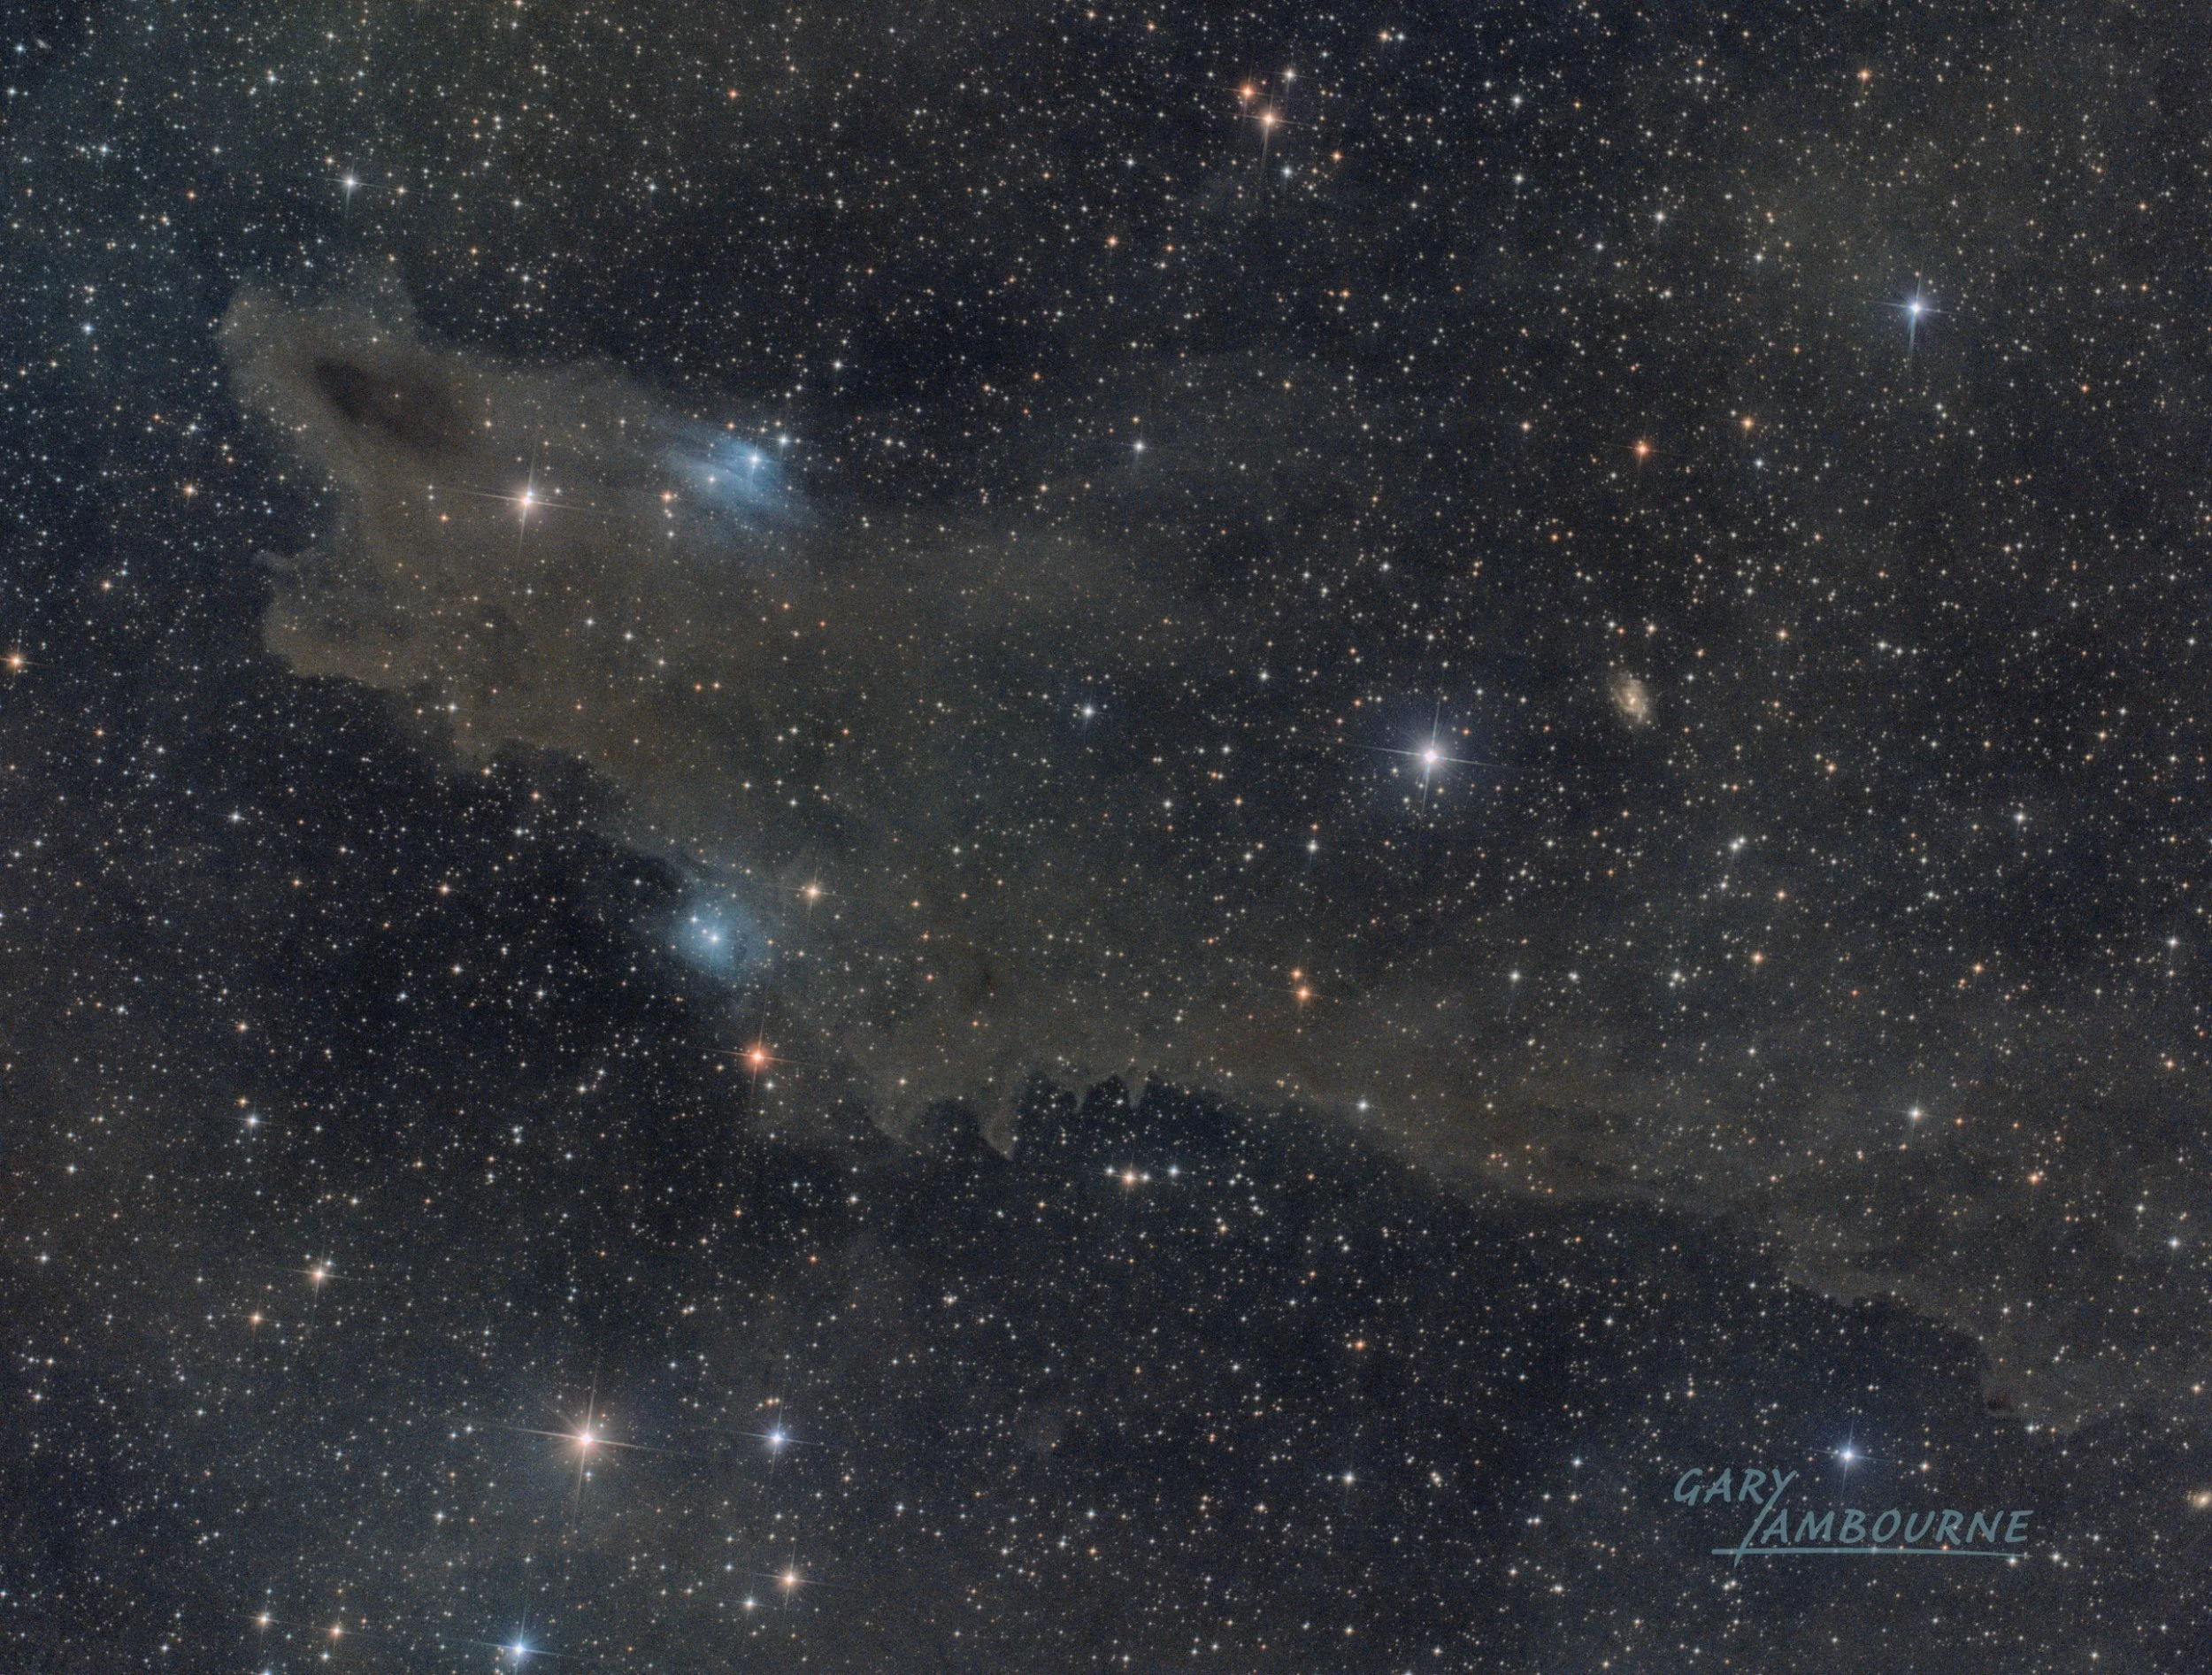
The Dark Shark LDN 1235 - both nights images combined